Are you ready to add a touch of creativity and charm to your garden? Look no further! In this article, you’ll find a collection of 10 unique and inspiring DIY projects that will transform your outdoor space into a picturesque haven. From colorful wind chimes to whimsical fairy gardens, these projects are sure to bring a smile to your face and a sense of wonder to anyone who sets foot in your garden. So grab your tools and get ready to embark on a journey of creativity and self-expression as you bring your garden to life with these delightful decor ideas.
Hand-painted Rocks
If you’re looking for a simple and fun way to add a touch of personalization to your garden, hand-painted rocks are the perfect project for you. All you need are some rocks, paint, and a little creativity.
Materials Needed
To get started with your hand-painted rock project, you’ll need a few basic materials:
- Smooth rocks: Look for rocks with a smooth surface, as this will make it easier to paint on.
- Acrylic paint: Choose a variety of colors to bring your designs to life.
- Paintbrushes: Opt for different brush sizes for more detailed work.
- Sealer: A clear sealer spray will protect your designs from the elements.
Step-by-Step Instructions
- Clean the rocks: Before you begin painting, make sure the rocks are free from any dirt or debris. A quick rinse with water and some gentle scrubbing will do the trick.
- Plan your design: Decide on the design you want to paint on each rock. You can go for simple patterns or unleash your artistic side with intricate scenes or abstract designs.
- Start painting: Use your paintbrushes and acrylic paint to bring your design to life. Take your time and layer the paint as needed to achieve the desired effect.
- Seal the rocks: Once the paint has dried, apply a clear sealer spray to protect your designs from the weather. This will help ensure that your hand-painted rocks stand the test of time in your garden.
Ideas for Designs
There are endless possibilities when it comes to hand-painted rock designs. Here are a few ideas to get you started:
- Inspirational quotes: Paint uplifting quotes or words on your rocks to bring positivity to your garden.
- Animals and insects: Create a mini rock menagerie with painted ladybugs, butterflies, or even cute little cats.
- Nature-inspired: Let your garden blend with nature by painting flowers, leaves, or even landscapes on your rocks.
- Polka dots and patterns: Keep it simple and playful with vibrant polka dot designs or geometric patterns.
Upcycled Planters
If you’re looking to add a touch of green to your garden, consider upcycled planters. These DIY projects not only provide a new purpose for old items but also give your garden a unique and eco-friendly flair.
Materials Needed
To get started with your upcycled planter project, gather the following materials:
- Old containers: Look around your house for items that can be repurposed as planters, such as tin cans, teapots, or even old boots.
- Drilling equipment: Depending on the material of your chosen container, you may need a drill to create drainage holes.
- Potting soil: Ensure your plants have a nutritious home by using quality potting soil.
- Plants: Choose a variety of plants that suit the size and style of your upcycled planters.
Step-by-Step Instructions
- Clean and prepare the containers: Thoroughly clean and remove any labels or residue from your chosen containers.
- Create drainage holes: If your containers do not already have drainage holes, use a drill to create a few small holes at the bottom. This will prevent waterlogging and ensure healthy plant growth.
- Fill with potting soil: Fill your upcycled planter containers with potting soil, leaving enough space for the plants to root.
- Plant your greens: Carefully transplant your chosen plants into the upcycled containers, firming the soil gently around the roots.
- Water and care for your plants: After planting, give your new planters a good watering. Follow the specific care instructions for each plant to ensure their healthy growth.
Creative Ideas for Planters
When it comes to upcycled planters, the possibilities are endless. Here are a few creative ideas to inspire you:
- Tea kettle planter: Turn an old tea kettle into a charming planter by filling it with colorful flowers or cascading vines.
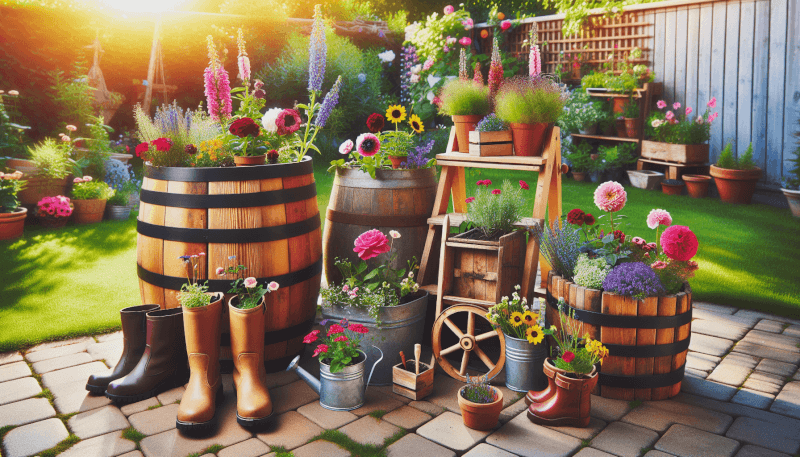
- Boot planters: Give old boots a new purpose by planting vibrant flowers inside them. This whimsical touch will bring a playful element to your garden.
- Mason jar herb garden: Repurpose spare mason jars as herb planters. Hang them from the fence or arrange them on a windowsill for easy access to fresh herbs while cooking.
- Succulent driftwood planter: If you have pieces of driftwood lying around, use them as a base for a succulent planter. These low-maintenance plants will thrive in this unique home.

Mosaic Stepping Stones
Add a touch of art to your garden with mosaic stepping stones. These decorative stones not only provide a safe path to walk on but also add a pop of color and creativity to your outdoor space.
Materials Needed
To create your mosaic stepping stones, gather the following materials:
- Concrete stepping stones: Choose pre-made concrete stepping stones in your desired shape and size. Alternatively, you can create your own using a stepping stone mold and quick-setting concrete.
- Mosaic tiles: Opt for glass or ceramic tiles in various colors to create your mosaic design. Broken tiles or leftover pieces from other projects work great too.
- Tile adhesive: Use a tile adhesive specifically designed for outdoor use to ensure durability.
- Grout: Choose a grout color that complements your mosaic design.
Step-by-Step Instructions
- Prepare the stepping stones: If you are not using pre-made stepping stones, carefully mix and pour quick-setting concrete into your stepping stone molds. Allow them to set according to the product instructions before proceeding.
- Plan your design: Before applying the tiles, sketch out your design on the stepping stones using a marker or chalk. This will help guide you during the application process.
- Apply tile adhesive: Using a trowel or putty knife, apply a layer of tile adhesive onto a small section of the stepping stone.
- Place the tiles: Press the mosaic tiles into the adhesive, following your design. Leave a small gap between each tile for the grout.
- Continue the process: Repeat steps 3 and 4 until your entire design is complete. Allow the adhesive to dry according to the manufacturer’s instructions.
- Apply grout: Mix the grout according to the package instructions and apply it to the spaces between the tiles using a grout float or your fingers. Wipe off any excess grout with a damp sponge.
- Let it cure: Allow the grout to cure for the recommended time before walking on the stepping stones.
Ideas for Mosaic Designs
Let your creativity shine with these mosaic design ideas for your stepping stones:
- Geometric patterns: Create a modern and stylish look by arranging small mosaic tiles in geometric shapes, such as triangles, squares, or diamonds.
- Nature-inspired: Arrange mosaic tiles in the shape of flowers, leaves, or even butterflies to bring a touch of nature to your garden path.
- Colorful mosaics: Make a statement with vibrant and contrasting mosaic tiles. Mix different colors and shapes to create a visually stunning design.
- Personalized designs: Incorporate your initials, a meaningful symbol, or a favorite quote into your stepping stone design. This adds a personal touch to your garden decor.
Vertical Gardens
Make the most of your available space by creating a vertical garden. Whether you have a small balcony or a large backyard, vertical gardens are a great way to add greenery and beauty to any wall or fence.
Materials Needed
To start your vertical garden project, gather these essential materials:
- Vertical garden planter system: Choose a ready-made vertical garden planter or construct your own using materials like pallets or PVC pipes.
- Plants: Opt for plants that are suitable for vertical growth, such as trailing vines, ferns, or herbs.
- Soil: Use a high-quality potting soil that is suitable for the specific plants you have chosen.
- Watering system: Depending on the design of your vertical garden, you may need irrigation tools like drip hoses or a self-watering system.
Step-by-Step Instructions
- Plan your vertical garden: Determine the size, location, and design of your vertical garden. Consider factors like sunlight exposure and the weight-bearing capacity of the chosen surface.
- Prepare your vertical garden system: If you are using a ready-made vertical garden planter, follow the manufacturer’s instructions for assembly. If building your own, ensure it is securely attached to the wall or fence.
- Prepare the planting area: Depending on the design, you may need to attach a backing material, such as fabric or plastic, to retain the soil and prevent it from spilling out. Ensure adequate drainage by adding holes if necessary.
- Plant your greenery: Start by adding a layer of potting soil to the bottom of each planting pocket or container. Carefully transplant your chosen plants into their designated spaces, ensuring the roots are covered with soil.
- Water and maintain your vertical garden: Water your newly planted vertical garden thoroughly, ensuring that the soil is evenly moist. Follow the specific care instructions for each plant to promote healthy growth.
- Regular maintenance: Check your vertical garden regularly for signs of pests, disease, or nutrient deficiency. Trim and prune plants as needed to maintain their shape and encourage growth.
Types of Plants Suitable for Vertical Gardens
When selecting plants for your vertical garden, consider their specific needs and growth habits. Here are a few plant options that thrive in vertical garden environments:
- Trailing vines: Plants like Ivy, Trailing Pothos, or Sweet Potato Vine add a cascading effect and create a lush and dramatic display.
- Ferns: Boston Ferns, Maidenhair Ferns, or Bird’s Nest Ferns thrive in the moist and shaded environment provided by a vertical garden.
- Herbs: Basil, Rosemary, or Thyme are excellent choices for vertical herb gardens, providing both culinary use and aromatic beauty.
- Succulents: If you have a sunny vertical garden, succulents like Sedum, Echeveria, or Haworthia are great options due to their low maintenance requirements.

Recycled Bottle Wind Chimes
Add a delightful musical element to your garden with recycled bottle wind chimes. Not only do these chimes produce soothing sounds, but they also repurpose old bottles into beautiful and eco-friendly decor.
Materials Needed
To create your own recycled bottle wind chimes, gather the following materials:
- Glass or plastic bottles: Choose bottles of various colors, shapes, and sizes to create a visually appealing wind chime. Make sure they are clean and label-free.
- String or fishing line: Use a strong and durable material to hang the bottles and create the overall structure of your wind chime.
- Beads or small trinkets: Select colorful beads or trinkets that can be threaded onto the string to add extra decoration and enhance the sounds of the wind chime.
- Wood or metal piece: Choose a sturdy base, such as a piece of driftwood or a metal ring, to hang the bottles from and create the top of the wind chime.
- Scissors: Use scissors to cut the string or fishing line to the desired lengths and trim any excess.
Step-by-Step Instructions
- Prepare the bottles: Clean the bottles thoroughly, removing any labels or residue. If desired, you can also remove the bottle caps for a different sound effect.
- Create the hanging structure: Attach strings or fishing lines of different lengths to your chosen wooden or metal base. These will serve as the vertical supports for hanging the bottles.
- Thread beads or trinkets: Thread colorful beads or small trinkets onto each string, spacing them out to create a pleasing visual effect and sound when the wind blows.
- Attach the bottles: Tie the strings securely around the necks of the bottles, ensuring they are evenly spaced and can move freely without hitting each other.
- Hang and test your wind chime: Find a suitable location in your garden to hang your wind chime. Make sure it has enough space to sway with the wind. Test it by blowing gently to enjoy the tranquil melodies.
Ideas for Bottle Selection and Decoration
Let your creativity flow when selecting and decorating your recycled bottle wind chimes. Here are a few ideas to inspire you:
- Colorful collection: Choose bottles in various colors to create a vibrant and eye-catching wind chime that adds a pop of color to your garden.
- Frosted glass elegance: Apply frosted glass spray paint to the bottles for an elegant and sophisticated look. This adds a touch of privacy and diffuses the sunlight beautifully.
- Upcycled wine bottles: Repurpose wine bottles by cutting the bottoms off to create unique and interesting shapes. Sand the edges for safety and a smooth finish.
- Purposeful bottle selection: Use bottles from your favorite sodas, juices, or wines as a conversation starter and a personal touch to your wind chime.
Fairy Gardens
Create a whimsical and enchanted spot in your garden with a fairy garden. These miniature landscapes are a delight to create and can transport you and your guests into a magical world.
Materials Needed
To bring your fairy garden to life, gather the following materials:
- Container or area: Choose a container or designated area in your garden that will serve as the home for your fairy garden. Opt for a small planter, an old wheelbarrow, or even a section of your flower bed.
- Miniature accessories: Acquire miniature accessories such as fairy figurines, miniature houses, tiny garden furniture, and whimsical decorations.
- Plants: Select small plants or succulents that will fit the scale of your fairy garden. Consider plants like miniature roses, baby’s tears, or moss.
- Potting soil: Use a well-draining potting soil mix suitable for the chosen plants.
- Decorative elements: Optional decorative elements can include small stones, fairy lights, tiny pebbles, or fairy garden signs.
Step-by-Step Instructions
- Choose your fairy garden location: Select a container or a designated area in your garden that will be the perfect canvas for your fairy garden.
- Map out the design: Plan where each item will go within your fairy garden, visualizing the miniature landscape you want to create.
- Prep the soil: If using a container, fill it with potting soil, leaving enough space for the plants and accessories. If working within an existing garden area, create small pockets and mounds for the plants and decor to sit in.
- Plant the greenery: Carefully transplant your chosen plants into your fairy garden, being mindful of their size and the overall aesthetic you want to achieve.
- Arrange the accessories: Position the miniature accessories and decorations within your fairy garden. Create vignettes or little scenes with the fairy figurines, miniature houses, and furniture.
- Add the finishing touches: Sprinkle small stones or tiny pebbles around the plants and accessories for added texture. Incorporate fairy lights for a magical glow during the evening hours.
- Regular maintenance: Water your fairy garden as needed, ensuring the soil remains moist but not waterlogged. Trim and maintain the plants to keep your enchanted scene looking its best.
Creative Ideas for Fairy Garden Themes
Let your imagination run wild when choosing a theme for your fairy garden. Here are a few ideas to spark your creativity:
- Beach escape: Create a coastal oasis with miniature beach chairs, seashells, and tiny umbrellas. Incorporate plants like succulents and sand-friendly ground covers.
- Enchanted forest: Craft a magical woodland scene with tiny fairy doors, mushroom miniatures, and miniature trees. Use moss and ferns to create a lush forest floor.
- Tea party haven: Set up a charming fairy tea party with miniature table and chairs, tea sets, and dainty floral accents. Surround the area with flowering plants or delicate herbs.
- Fairy village: Build a community of fairy houses and pathways using natural materials like sticks, moss, or rocks. Integrate small gnome figurines or animal miniatures to enhance the village atmosphere.

Hanging Basket Planters
Maximize your vertical space and create a stunning display of cascading blooms with hanging basket planters. These versatile planters are perfect for adding a touch of greenery and color to walls, fences, or porch ceilings.
Materials Needed
To create your hanging basket planters, gather the following materials:
- Hanging baskets: Choose baskets in various sizes and materials, such as wire, woven, or ceramic.
- Liners: Select liners made of coco coir, sphagnum moss, or burlap to retain moisture and provide proper drainage.
- Potting soil: Use a well-draining potting soil mix suitable for the types of plants you plan to grow.
- Plants: Select trailing or cascading plants that will flourish in hanging baskets. Options include petunias, ivy, trailing geraniums, or lobelia.
- Hanging hardware: Purchase hooks or brackets suitable for the weight of your hanging baskets and the type of surface you’ll be attaching them to.
Step-by-Step Instructions
- Choose suitable locations: Select areas that have enough sunlight exposure for the plants you’ve chosen. Ensure that the chosen surface where the hanging baskets will be attached is sturdy enough to support the weight.
- Prepare the hanging baskets: Line the inside of your chosen baskets with a liner of your choice, ensuring it fits snugly and covers the entire interior.
- Fill with potting soil: Fill the hanging baskets with potting soil, leaving enough space for the plants to root. Ensure that the soil is evenly distributed and that the basket is not too heavy to hang.
- Plant your cascades: Carefully transplant your chosen plants into the hanging baskets, situating them in optimal positions for cascading growth. Firm the soil gently around the roots.
- Water and maintain: Thoroughly water the newly planted hanging baskets, ensuring that the soil is adequately soaked. Regularly monitor the soil moisture levels and water as needed to keep the plants healthy and thriving.
- Hang the baskets: Install suitable hooks or brackets according to the instructions provided. Hang the baskets securely, allowing enough space for the plants to grow freely. Check the stability of the hanging baskets regularly.
Ideas for Filling the Baskets
Create stunning displays with your hanging basket planters by considering these creative ideas:
- Colorful mix: Combine vibrant flowering plants like petunias, calibrachoas, or fuchsias in complementary or contrasting colors to create a visually striking arrangement.
- Edible delights: Opt for trailing herbs like thyme, oregano, or creeping rosemary for both functional and decorative appeal. Harvest fresh herbs for culinary use whenever needed.
- Fragrant beauties: Select aromatic plants like sweet alyssum, lavender, or scented geraniums to fill your hanging baskets with a delightful fragrance.
- Mono-color elegance: Create an understated and elegant look by using a single color palette throughout your hanging baskets. Consider white impatiens, bacopa, or trailing lobelia for a refined display.
Pallet Garden Furniture
Add a rustic touch to your outdoor space with pallet garden furniture. These DIY projects are not only environmentally friendly but also provide a unique and cost-effective way to furnish your garden.
Materials Needed
To embark on your pallet garden furniture project, gather the following materials:
- Pallets: Source wooden pallets of varying sizes and conditions. Ensure the pallets are clean, dry, and free from any chemicals.
- Sandpaper: Use sandpaper to smooth any rough surfaces, splinters, or imperfections on the pallets.
- Paint or stain: Decide on the finishing look you want for your pallet furniture. Choose paint or stain suitable for outdoor use and wood surfaces.
- Cushions or upholstery: Consider adding cushions or upholstery for added comfort and style to your pallet furniture.
- Nails, screws, or wood adhesive: Determine the appropriate fastening method depending on your pallet furniture design and personal preference.
Step-by-Step Instructions
- Plan your furniture design: Decide on the type of furniture you want to make using your pallets. Popular options include outdoor benches, coffee tables, or lounge chairs.
- Choose the right pallets: Select pallets in good condition, ensuring they are sturdy and suitable for outdoor use. Check for any potential damage or rot.
- Prepare the pallets: Sand the pallets to remove any rough edges or splinters. Clean them thoroughly, removing any dirt or debris.
- Paint or stain: Apply your chosen paint or stain to the pallets, following the manufacturer’s instructions. Allow them to dry completely.
- Assemble the furniture: Begin assembling your pallet furniture by joining the pallets together using nails, screws, or wood adhesive. Depending on the design, you may need additional tools like a saw or drill.
- Add cushions or upholstery: Enhance the comfort and aesthetic appeal of your pallet furniture by adding cushions or upholstery. Opt for fabrics that are suitable for outdoor use and can withstand the elements.
- Enjoy your new furniture: Once your pallet furniture is complete, place it in your garden or outdoor space and take a moment to relax and enjoy the fruits of your labor.
Design Ideas for Pallet Furniture
Get creative with your pallet furniture designs and consider the following ideas:
- Pallet daybed: Combine several pallets together to create a spacious and comfortable daybed for lounging or napping in the sun. Add cushions or a mattress for extra comfort.
- Pallet dining set: Use pallets to construct a rustic dining table and matching benches. Add cushions or seat pads for a touch of comfort during al fresco meals.
- Vertical planters: Repurpose pallets into vertical planters to create a living wall in your garden. Plant herbs, flowers, or succulents in the built-in compartments for added greenery.

Repurposed Garden Art
Get creative and repurpose old items into unique garden art pieces. Not only will you give new life to forgotten objects, but you’ll also add a touch of personality and charm to your outdoor space.
Materials Needed
To start repurposing old items into garden art, gather the following materials:
- Old objects: Look around your home, garage, or local thrift stores for items that can be repurposed. Consider old tools, kitchenware, bicycle wheels, or even broken furniture.
- Paint or exterior coatings: Opt for paint or coatings suitable for outdoor use and that can withstand weather conditions.
- Adhesives or hardware: Choose appropriate adhesives or hardware, depending on the materials you’ll be working with.
- Protective gear: Wear gloves, goggles, and masks when handling potentially hazardous materials or during any cutting or drilling tasks.
Step-by-Step Instructions
- Select your objects: Choose objects that are weather-resistant or can be easily treated to withstand outdoor conditions. Ensure they are clean and free from any loose or flaking materials.
- Visualize your garden art: Plan what you want your repurposed objects to become. Consider how they will fit into your garden and bring your vision to life.
- Prepare the objects: Depending on the condition of the objects, they may require cleaning, sanding, or minor repairs. Ensure surfaces are smooth and ready for painting or treating.
- Paint or treat the objects: Apply paint, stains, or protective coatings to transform the objects into unique works of art. Consider using colors that complement your garden’s overall aesthetic.
- Arrange and secure: Determine where and how you want to display your repurposed garden art. Arrange them in a visually pleasing manner and secure them to prevent movement or damage from wind or other elements.
- Maintain and enjoy: Take care of your repurposed garden art by regularly cleaning and inspecting them for any necessary touch-ups or repairs. Sit back, relax, and admire your creativity and resourcefulness in enhancing your garden.
Creative Ideas for Repurposing
Let your imagination soar and consider these creative ideas for repurposing objects into garden art:
- Vintage bicycle planter: Turn an old bicycle into a stunning planter by removing the wheels, attaching baskets or pots, and placing your favorite plants inside. This nostalgic piece will add a whimsical touch to your garden.
- Garden tool sculptures: Transform old rusted garden tools into unique sculptures. Weld them together to create statuesque figures, or arrange them as abstract art pieces.
- Colander wind chimes: Repurpose old colanders or sieves by attaching them to sturdy chains or strings, adorned with colorful beads or trinkets. Hang them in your garden to create soothing sounds when the wind blows.
- Teapot birdhouse: Convert old teapots into charming birdhouses. Attach them to tree branches or posts, creating cozy homes for your feathered friends.
Garden Pathway Lighting
Elevate the ambiance of your garden with pathway lighting. These lighting fixtures not only illuminate your walking paths but also add a welcoming and enchanting atmosphere to your outdoor space.
Materials Needed
To create captivating garden pathway lighting, gather the following materials:
- Path lights: Choose solar-powered or low-voltage LED path lights that are weather-resistant and suitable for outdoor use.
- Stakes or mounting materials: Depending on the style of your path lights, you will need stakes, mounting brackets, or hardware to secure the lights in place.
- Outdoor extension cords and connectors: If your chosen path lights require electrical connectivity, ensure you have the appropriate outdoor-rated extension cords and connectors.
- Timer or smart lighting system (optional): Consider installing timers or smart lighting systems to automate the lighting schedules and conserve energy.
Step-by-Step Instructions
- Plan your pathway lighting design: Determine the areas of your garden or walkways that require lighting. Consider factors such as visibility, safety, and aesthetics.
- Install the lighting fixtures: Begin by positioning the path lights along your desired pathways. Use stakes or mounting brackets to secure them in place, ensuring they are stable and upright.
- Connect the lights (if necessary): If using electrical path lights, follow the manufacturer’s instructions to connect them to an outdoor power source. Use extension cords and connectors as needed, keeping them protected from moisture and hidden from view.
- Test the lighting: Turn on your path lights to ensure they are functioning correctly and providing the desired illumination. Make any necessary adjustments to the positioning or angle of the lights for optimal effect.
- Consider lighting control: If desired, install timers or smart lighting systems to automate the on/off schedules of your pathway lighting. This will ensure your garden is always beautifully lit, even when you’re not there to manually control it.
- Regular maintenance: Inspect your pathway lighting periodically, ensuring all lights are working properly and free from debris or obstructions. Replace bulbs or batteries as necessary to maintain optimal performance and aesthetics.
Types of Lights and Placement Ideas
Get inspired by these types of lights and placement ideas for your garden pathway lighting:
- Solar-powered stake lights: These self-contained lights are easy to install and require no wiring. They absorb sunlight during the day and illuminate the pathway at night.
- Low-voltage LED lights: Ideal for longer pathways, these lights are energy-efficient and provide consistent illumination. They require a low-voltage transformer and wiring for installation but offer a wider range of design options.
- Lantern-style lights: Add a touch of charm and nostalgia with lantern-style lights placed intermittently along the pathway. These can be solar-powered or wired, depending on your preference.
- Up-lighting: Strategically place up-lighting fixtures to highlight specific plants, statues, or architectural features along the pathway. This creates a dramatic effect and adds depth to your garden.
With these 10 creative DIY garden decor projects, you can transform your outdoor space into a personalized haven. From hand-painted rocks and upcycled planters to mosaic stepping stones and vertical gardens, the possibilities are endless. Let your imagination soar, gather your materials, and get ready to unleash your inner artist while adding beauty and charm to your garden. Get started today and enjoy the fruits of your creative labor as you relax and savor the beauty of your transformed garden oasis.

