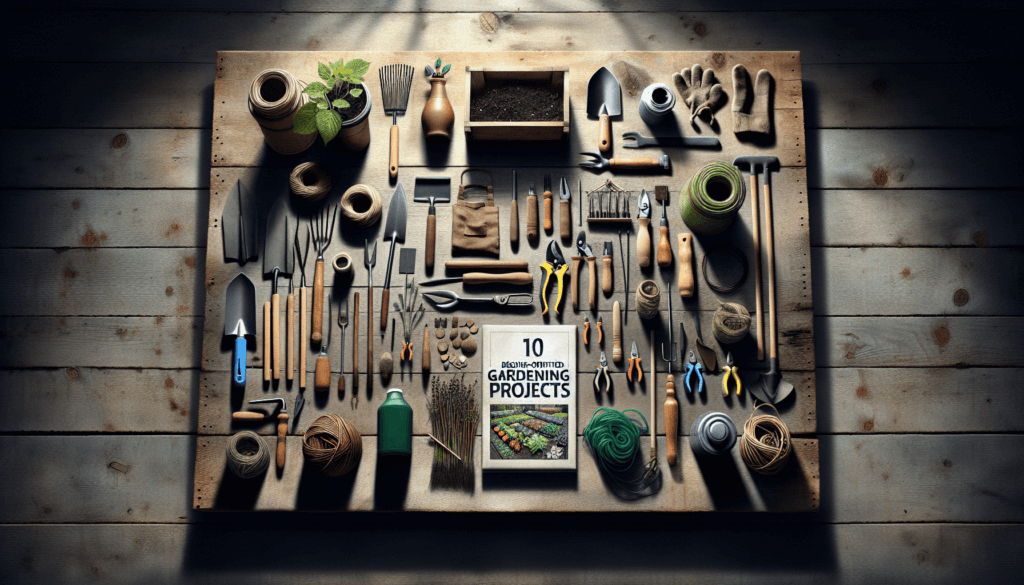
Are you a gardening enthusiast looking to spruce up your outdoor space? Look no further! This article provides a compilation of 10 simple and enjoyable DIY projects that are perfect for beginners. From creating a vertical herb garden to constructing a homemade birdhouse, these projects will not only add charm to your garden but also nurture your green thumb. Get ready to roll up your sleeves and embark on a fun-filled journey of transforming your garden into a vibrant oasis with these 10 easy DIY projects!

Container Gardening
Creating a container garden
Container gardening is a perfect way to bring the joy of gardening into your life, even if you have limited space. Whether you have a small balcony, a rooftop, or just a tiny patio, you can create a beautiful container garden that will be the envy of all your neighbors. To start, choose containers that have drainage holes to ensure proper water drainage. Fill the containers with a mixture of high-quality potting soil, compost, and perlite for proper drainage and nutrients. Once your containers are ready, you can start planting a variety of plants, such as flowers, herbs, or even vegetables. Be sure to water your container garden regularly, as the soil in containers tends to dry out faster than in traditional gardens.
Choosing the right containers
When it comes to choosing containers for your garden, you have a wide variety of options. You can use traditional terracotta pots, plastic pots, wooden containers, or even repurpose old items such as buckets, barrels, or tires. When selecting containers, keep in mind the size and needs of the plants you want to grow. Some plants, like tomatoes, need larger containers, while others, like herbs, can thrive in smaller pots. Make sure the containers have proper drainage holes to prevent waterlogged soil. Additionally, consider the aesthetics of the containers and how they will fit into your overall garden design.
Selecting suitable plants
Choosing the right plants for your container garden is crucial to ensure a successful and thriving garden. Consider the amount of sunlight your garden receives and choose plants that thrive in those conditions. Some popular container plants include herbs like basil, mint, and rosemary, as well as colorful flowers like petunias, marigolds, and pansies. You can also grow vegetables such as tomatoes, peppers, and lettuce in containers. Be mindful of the size of the plants and their root systems when selecting containers, as some plants require more space than others.
Caring for your container garden
Caring for a container garden is relatively easy, but it does require regular attention. Watering is one of the most important aspects of container gardening. Check the moisture level of the soil regularly, as containers tend to dry out faster than traditional gardens. Water your plants thoroughly, making sure the water reaches the roots. Fertilize your container garden regularly with a balanced fertilizer to ensure healthy growth. Prune and remove any dead or damaged parts of the plants to promote new growth. Finally, keep an eye out for pests and diseases, and take appropriate measures to protect your plants.
Vertical Gardening
Building a vertical garden structure
Vertical gardening is an excellent option for gardeners with limited space. By utilizing vertical structures, such as trellises, walls, or fences, you can maximize your gardening area and create a stunning visual display. When building a vertical garden structure, make sure it is sturdy and securely attached to the ground or wall. Consider the weight-bearing capacity of the structure and choose suitable materials, such as wood or metal. Plan the layout of your structure, taking into account the plants’ growth patterns and their need for sunlight. Once your structure is in place, attach the plants to it using plant ties or trellis netting.
Selecting plants for vertical gardening
When selecting plants for a vertical garden, consider their growth habits and requirements. Vining plants, such as cucumbers, beans, and peas, are excellent choices for vertical gardening, as they can easily climb and attach themselves to the structure. You can also grow flowering vines like morning glories or climbing roses for a beautiful display. Additionally, consider using containers or hanging baskets to grow trailing plants like petunias or trailing ivy. Mixing different types of plants will create a visually appealing and diverse vertical garden.
Maintaining a vertical garden
Maintaining a vertical garden is essential to ensure its health and longevity. Regularly check the plants’ growth and remove any dead or damaged parts. Train the climbing plants to grow along the structure and provide additional support as needed. Water the plants thoroughly, ensuring the water reaches the root system. Due to the vertical nature of the garden, watering may need to be done more frequently. Fertilize the plants regularly with a balanced fertilizer to provide them with essential nutrients. Keep an eye out for pests and diseases and take appropriate measures to prevent and treat them.
DIY Raised Beds
Constructing a raised bed
Raised beds are a fantastic way to create a defined growing area and improve soil quality for your plants. To construct a raised bed, determine the desired size and shape and mark the area. Remove any vegetation and level the ground. Use materials like wood, bricks, or stones to create the walls of the raised bed. Make sure the walls are secure and level. If using wood, consider using rot-resistant lumber or line the interior with plastic to prevent wood rot. Fill the raised bed with a mixture of topsoil, compost, and organic matter to provide a nutrient-rich environment for your plants.
Choosing the right location
Selecting the right location for your raised bed is essential for the success of your plants. Choose an area that receives at least six hours of sunlight daily. Additionally, consider the proximity to a water source and ensure it is easily accessible for watering. Avoid areas with poor drainage or where water tends to accumulate. Check for any existing underground utilities before digging. Take into account any nearby trees or structures that may cast excessive shade or hinder root growth.
Preparing the soil for raised beds
Preparing the soil for raised beds is crucial to ensure optimal plant growth. Start by removing any existing vegetation or weeds from the area. Loosen the soil to a depth of at least 8-10 inches using a garden fork or tiller. Amend the soil by adding compost or aged manure to improve its texture and fertility. Mix the amendments thoroughly with the existing soil. Level the soil and remove any debris or large rocks.
Planting in raised beds
When planting in raised beds, consider the spacing requirements and the needs of your chosen plants. Plant taller plants towards the back of the bed to provide shade for shorter ones. Plant similar crops together to maximize space and facilitate maintenance. Be mindful of the recommended planting depth for each plant and ensure they are planted at the correct level. Water the plants thoroughly after planting and continue to monitor and water them regularly.
Creating a Herb Garden
Designing your herb garden
Designing a herb garden is an enjoyable and rewarding process. Start by deciding on the location and size of your herb garden. Consider the amount of sunlight the area receives; most herbs require at least six hours of direct sunlight daily. Determine whether you want a formal or informal design. Formal designs often feature geometric shapes and neat rows, while informal designs have a more natural and free-flowing appearance. Consider incorporating pathways or stepping stones to provide easy access to the herbs.
Choosing the right herbs
When it comes to choosing herbs for your garden, the options are vast. Consider the culinary herbs you use most often in your cooking, such as basil, rosemary, thyme, and parsley. Additionally, think about the medicinal properties of certain herbs, like lavender or chamomile. Take into account the hardiness of the herbs and choose varieties that are suitable for your climate. Mix different types of herbs to create a diverse and visually appealing garden.
Planting and caring for herbs
When planting herbs, ensure they have enough space to grow and spread their roots. Most herbs prefer well-draining soil, so consider adding compost or sand to improve the soil structure. Plant the herbs at the appropriate depth and water them thoroughly after planting. Herbs generally prefer moderate watering, so monitor the soil moisture and water as needed. Fertilize the herbs sparingly, as too much fertilizer can affect their flavor. Prune the herbs regularly to promote bushier growth and prevent them from becoming leggy.
Harvesting and using your herbs
One of the joys of having a herb garden is being able to harvest fresh herbs for your culinary creations. Harvest herbs by snipping off the stems just above the leaf nodes. Avoid harvesting more than a third of the plant at a time to ensure its continued growth. Use the harvested herbs immediately or store them in airtight containers in a cool and dry place. Drying herbs is another popular method of preservation. Simply tie a bundle of herbs together and hang them upside down in a well-ventilated area. Once dry, remove the leaves from the stems and store them in labeled containers for future use.
Building a Trellis
Types of trellises
There are various types of trellises that you can build for your garden, depending on your needs and preferences. Some common types include wall-mounted trellises, arched trellises, A-frame trellises, and ladder trellises. Wall-mounted trellises are attached directly to a wall or fence, providing vertical growing space. Arched trellises create a beautiful focal point and can be covered in climbing flowers like roses or clematis. A-frame trellises are freestanding and often used for vining vegetables such as cucumbers or beans. Ladder trellises are versatile and can be leaned against a wall or used as a room divider.
Selecting suitable plants for trellises
When selecting plants for trellises, consider their growth habit and requirements. Vining plants with tendrils or aerial roots, such as peas, beans, or passionflowers, are excellent choices for trellises. Climbing roses, clematis, or morning glories can add a touch of beauty to your garden. Choose plants that will complement the overall design and theme of your garden. Be sure to provide the necessary support for heavy or vigorous climbers to ensure the trellis remains sturdy and intact.
Building a trellis
Building a trellis can be a fun and rewarding project. Start by determining the size and shape of your trellis. Measure the area where the trellis will be installed, ensuring it fits the available space. Choose materials that are sturdy and weather-resistant, such as wood or metal. Decide on the design and pattern of the trellis, ensuring it matches your aesthetic preference. Assemble the materials and secure them together using screws, nails, or wire. Test the stability of the trellis before installing it in your garden.
Maintaining and pruning plants on trellises
Regular maintenance and pruning are essential to keep plants on trellises healthy and looking their best. Monitor the growth of the plants and train them to grow along the trellis. Use plant ties or clips to secure the plants to the trellis if needed. Prune the plants to remove any dead or damaged parts and to promote new growth. Trim the plants to maintain their desired shape and prevent overcrowding. Provide regular watering and fertilize the plants as needed to ensure their vitality and overall health.
DIY Compost Bin
Why composting is important
Composting is an environmentally friendly way to reduce waste and create nutrient-rich soil for your garden. It diverts organic waste from landfills, reduces greenhouse gas emissions, and conserves water. Compost adds valuable organic matter to the soil, improving its structure, water retention, and nutrient content. By composting at home, you can be a part of the solution to reduce waste and create a healthier environment.
Building a compost bin
Building a compost bin is a simple and cost-effective project. Start by selecting a location for your compost bin. Make sure it is easily accessible and receives a good amount of airflow. Choose a design that suits your needs, such as a wooden bin, wire mesh enclosure, or a repurposed container. Ensure the bin has enough space to hold your compost materials. Provide a lid or cover to keep pests out and retain moisture. Construct the bin using the chosen materials, making sure it is sturdy and secure.
Adding materials to the compost bin
To create compost, you need to provide a balanced mixture of organic materials. These include green materials, such as kitchen waste, grass clippings, or fresh plant trimmings, and brown materials, such as dried leaves, cardboard, or newspaper. Alternate layers of green and brown materials in the compost bin, making sure to chop or shred larger materials for faster decomposition. Add water to the compost pile to maintain moisture levels and accelerate the decomposition process. Turn the compost pile regularly to ensure adequate airflow and promote decomposition.
Using the compost in your garden
Compost is a valuable and nutrient-rich addition to your garden soil. Once your compost has fully decomposed, it can be used as a soil amendment or mulch. Spread a layer of compost over your garden beds to improve soil fertility and structure. Use compost to top-dress container plants or add it to potting mixes for added nutrients. Incorporate compost into planting holes when transplanting or use it as a side dressing for established plants. The organic matter in compost will feed beneficial soil organisms and provide a steady release of nutrients to your plants.
Constructing a Garden Pathway
Choosing the pathway design
Garden pathways not only provide a practical route through your garden but also add visual appeal and structure. Consider the overall style and theme of your garden when choosing a pathway design. Straight and formal pathways offer a clean and organized look, while curved pathways provide a more natural and organic feel. Take into account the size and shape of your garden and plan a pathway that flows smoothly and allows easy access to different areas. Consider incorporating materials like stone, gravel, or wood to create the desired aesthetic.
Preparing the pathway area
Before constructing a garden pathway, it is important to prepare the area properly. Remove any existing vegetation or weeds from the pathway area. Level the ground and ensure a stable and even surface for your pathway. If necessary, use a landscape fabric to prevent weed growth and provide a barrier between the soil and pathway materials. Plan the width and length of the pathway, considering the anticipated foot traffic and the needs of your garden.
Selecting suitable materials
The materials you choose for your garden pathway greatly contribute to its overall appearance and functionality. Natural materials like stone, gravel, or wood chips create a rustic and charming look. They are also durable and require minimal maintenance. Alternatively, you can opt for manufactured materials like pavers or concrete for a more polished and modern aesthetic. Consider the climate and specific needs of your garden when selecting materials, ensuring they are suitable for your region and can withstand the expected foot traffic.
Building and maintaining the pathway
Building a garden pathway requires careful installation and attention to detail. Start by laying down a base layer, such as sand or gravel, to create a stable foundation for the pathway materials. Arrange the chosen materials in the desired pattern or design, ensuring they fit snugly together. Use a level or straightedge to maintain a consistent height and alignment. Fill any gaps between the pathway materials with additional sand or gravel to prevent shifting or weed growth. Regularly sweep or hose off the pathway to keep it clean and free of debris. Replace any damaged or broken materials as needed to maintain the pathway’s integrity.
Creating a Butterfly Garden
Attracting butterflies to your garden
Creating a butterfly garden is a wonderful way to invite these enchanting creatures into your outdoor space. Butterflies are attracted to vibrant colors and nectar-rich flowers, making them an essential part of your garden design. Choose a variety of plants that bloom at different times of the year to provide a continuous source of nectar. Include native plants that are popular with local butterfly species. Avoid the use of pesticides, as they can harm butterflies and their caterpillars. Provide resting spots, such as flat stones or logs, where butterflies can bask in the sun and warm their wings.
Choosing butterfly-friendly plants
Selecting the right plants for your butterfly garden is crucial to attract a diverse range of butterfly species. Consider planting flowers with tubular-shaped blossoms, such as butterfly bush, zinnias, or salvias, as they are ideal for butterflies to feed on nectar. Include host plants, which are specific plants that caterpillars feed on. Examples include milkweed for monarch butterflies or parsley for swallowtails. Provide a mix of different flower colors and heights to attract a variety of butterfly species.
Providing water and food sources for butterflies
In addition to nectar-rich flowers, butterflies also need water and food sources. Provide shallow dishes or saucers filled with water and a few small stones for butterflies to perch on while drinking. This will help butterflies stay hydrated, especially during hot and dry periods. Some butterflies also feed on ripe fruit or tree sap, so consider placing overripe fruit or a homemade butterfly feeder in your garden. These additional food sources will attract a wider range of butterfly species and provide them with the necessary nutrients.
Maintaining a butterfly garden
Maintaining a butterfly garden involves regular care and attention. Keep the garden clean and free of debris to provide a safe and inviting environment for butterflies. Remove faded or wilted flowers to encourage new blooms and continuous nectar production. Prune plants when necessary to prevent overcrowding and maintain their desired shape. Monitor the plants for pests and diseases and take appropriate measures to protect your butterfly garden. By maintaining a healthy and vibrant garden, you will continue to attract butterflies throughout the seasons.
DIY Birdhouse
Selecting the right birdhouse design
Building a birdhouse is not only an enjoyable DIY project but also a way to provide shelter for avian friends. When selecting a birdhouse design, consider the target bird species you want to attract. Different bird species have specific requirements for the size and shape of their nesting sites. Research the specific dimensions and specifications needed for the desired bird species. Choose a design that is suitable for your skill level and the available tools and materials. Opt for durable and weather-resistant materials to ensure the longevity of the birdhouse.
Materials needed for building a birdhouse
To build a birdhouse, you will need a few basic materials. These include wood for the main structure, screws or nails for assembly, and a saw or drill for cutting and shaping the wood. Opt for untreated wood or non-toxic finishes to ensure the safety of the birds. Additionally, consider adding ventilation holes to prevent overheating and drainage holes to eliminate any moisture buildup. Install a hinged or removable roof for easy cleaning and monitoring of the birdhouse.
Constructing and decorating the birdhouse
Once you have gathered the necessary materials, it’s time to construct the birdhouse. Start by cutting the wood into the required pieces according to your chosen design. Assemble the pieces using screws or nails, ensuring they are securely fastened. Sand the edges and surfaces of the birdhouse to remove any roughness or splinters. Decorate the birdhouse with non-toxic paint, stain, or natural finishes to add a touch of color and charm. Avoid using bright or flashy colors, as they may attract predators.
Mounting and maintaining the birdhouse
After constructing and decorating the birdhouse, it’s time to install it in your garden. Choose a sturdy and safe location, away from potential predators and disturbances. Mount the birdhouse on a pole or securely attach it to a tree or wall. Ensure the entrance hole faces away from prevailing winds and direct sunlight. Regularly monitor the birdhouse for any signs of activity or damage. Clean the birdhouse annually by removing old nesting material and disinfecting it with a mild bleach solution. Providing a well-maintained and safe birdhouse will attract a variety of bird species and contribute to their successful breeding and survival.
Installing a Drip Irrigation System
Benefits of drip irrigation
Installing a drip irrigation system in your garden offers numerous benefits, both for your plants and for water conservation. Drip irrigation delivers water directly to the plant roots, minimizing water loss through evaporation or runoff. This targeted watering method ensures that plants receive the right amount of water they need, reducing the risk of over or under-watering. Drip irrigation also helps to prevent foliar diseases by keeping the foliage dry. Additionally, the slow release of water can promote deeper root growth and healthier plants.
Planning and designing your system
Before installing a drip irrigation system, it is crucial to plan and design it properly. Assess your garden’s layout and determine the specific water requirements of your plants. Measure the distance between plants and calculate the flow rate necessary to provide adequate water. Consider the water source and available water pressure. Choose the appropriate drip emitters, tubing, and connectors based on your specific needs. Create a detailed plan or layout diagram for your system to guide the installation process.
Installing the drip irrigation components
Once you have planned your drip irrigation system, it’s time to install the components. Start by connecting the drip tubing to the water source using a pressure regulator and a backflow preventer. Lay the tubing along the desired routes, securing it with stakes or clips to keep it in place. Install drip emitters or micro-sprinklers at the base of each plant, ensuring they are positioned correctly to water the root zone. Test the system for leaks and make necessary adjustments or repairs. Once the system is functioning properly, cover the tubing with mulch to prevent evaporation and protect it from damage.
Maintaining and adjusting the system
Regular maintenance and adjustment of your drip irrigation system will ensure its efficiency and effectiveness. Check the system regularly for leaks, clogs, or damaged components. Flush the system periodically to remove any debris or mineral buildup that may hinder water flow. Adjust the water flow rate or emitter spacing as needed to meet the changing needs of your plants. Monitor the soil moisture levels and adjust the watering schedule accordingly. Additionally, make sure to winterize your drip irrigation system before the freezing temperatures arrive to prevent damage to the components.
In conclusion, these ten easy garden DIY projects for beginners offer a range of possibilities for enhancing your outdoor space. Whether you choose to create a container garden, build a trellis, or install a drip irrigation system, each project provides an opportunity to connect with nature and cultivate your own little oasis. So roll up your sleeves, gather your tools, and let your creativity flourish as you embark on these garden projects. With a little time and effort, you’ll soon be enjoying the fruits of your labor and experiencing the joy of a flourishing garden. Happy gardening!
