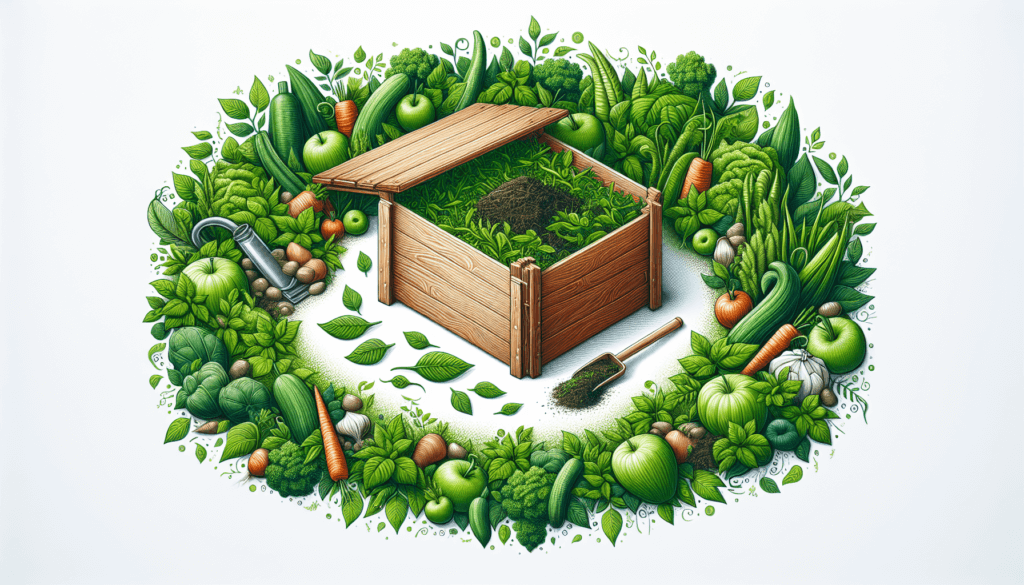
Making your own compost bin is a simple and rewarding way to reduce waste and create nutrient-rich soil for your garden. Whether you’re an experienced gardener or just starting out, this article will guide you through the step-by-step process of building your own compost bin using easily accessible materials. From selecting the right location to choosing the right ingredients, you’ll learn all the tips and tricks to create a sustainable and eco-friendly compost bin that will benefit both your plants and the environment. So grab your gardening gloves and get ready to turn your household waste into gardening gold!
Materials Needed
To make your own compost bin, you will need several materials to ensure successful composting.
Container
First and foremost, you will need a container to hold your compost. This can be a bin, a barrel, or even a specially designed composting system. The size and material of the container are important factors to consider.
Lid
Having a lid for your compost bin is crucial. It helps to retain moisture and keep pests and animals out of your compost. The lid should be sturdy and secure to prevent it from blowing away or being easily accessed by unwanted critters.
Drainage
Proper drainage is essential for composting. It allows excess water to escape and prevents your compost from becoming waterlogged. You will need materials for creating drainage holes in the bottom of your compost bin.
Aeration
Aeration is the process of providing oxygen to your compost pile. It helps to break down the organic materials efficiently. Aeration can be achieved by creating air vents or holes in your compost bin.
Thermometer
Monitoring the temperature of your compost is crucial for successful composting. You will need a compost thermometer to ensure that your compost pile reaches and maintains the ideal temperature range.
Composting Tools
To facilitate the composting process, you will need a few essential tools. These include a pitchfork or garden fork for turning your compost, a shovel or spade for adding materials, a compost turner for breaking up clumps, a compost thermometer to measure temperature, and a container for collecting kitchen scraps.
Choosing a Container
When choosing a container for your compost, there are several factors to consider.
Size
The size of your compost bin will depend on the amount of waste you generate and the available space in your yard or garden. It should be large enough to accommodate your composting needs but not so large that it becomes overwhelming to maintain.
Material
Compost bins can be made from a variety of materials, including plastic, wood, or metal. Each material has its own advantages and disadvantages. Plastic bins are lightweight and easy to move, but they may not be as durable as wood or metal bins. Wooden bins are aesthetically pleasing and provide good insulation, but they may require more maintenance. Metal bins are durable and resistant to pests, but they can be expensive.
Shape
Compost bins come in various shapes, including square, rectangular, and cylindrical. The shape of your bin should be based on your personal preference and available space. Consider the ease of access when choosing the shape of your compost bin.
Accessibility
Having easy access to your compost bin is important for adding materials and turning the pile. Make sure your compost bin has a wide opening or easy-to-remove lid for convenient access.
Additional Features
Some compost bins come with additional features, such as multiple compartments or tumbling mechanisms. These features can enhance the composting process but may come at an additional cost. Consider your specific composting needs when deciding on the additional features for your bin.
Adding a Lid
Adding a lid to your compost bin is essential for a few reasons.
Purpose
The primary purpose of a lid is to keep moisture in and pests out. It helps to maintain the proper moisture level in your compost pile by reducing evaporation. Additionally, a lid prevents unwanted critters, such as rodents and raccoons, from accessing and potentially scattering your compost materials.
Materials
When choosing a lid for your compost bin, opt for a sturdy and durable material that can withstand outdoor conditions. Consider materials like heavy-duty plastic, metal, or even a wooden lid. Make sure the lid fits snugly and securely on your compost bin to prevent it from blowing away in windy conditions.
Design
The design of your compost bin lid is a matter of personal preference. Some bins come with a hinged lid that provides easy access to your compost pile, while others have a removable lid. Consider the ease of use and convenience when selecting the design of your compost bin lid.
Installing Drainage
Proper drainage is crucial for the success of your compost pile.
Importance of Drainage
Drainage allows excess water to escape from your compost pile, preventing it from becoming waterlogged. When organic materials in your compost are too wet, they can become compacted and deprived of oxygen, leading to slow decomposition and unpleasant odors. Good drainage ensures that the compost pile remains well-aerated and healthy.
Materials for Drainage
To create drainage in your compost bin, you will need materials such as gravel, small rocks, or broken pieces of terracotta pots. These materials allow water to flow freely out of the compost pile while retaining the organic matter.
Creating Drainage Holes
To install drainage holes in your compost bin, you will need a drill with a bit size suitable for your chosen drainage material. Drill several holes in the bottom of the bin, ensuring that they are evenly spaced. These holes should be large enough to allow water to drain but small enough to prevent valuable compost from escaping.
Ensuring Proper Aeration
Aeration is crucial for the breakdown of organic materials in your compost pile.
Importance of Aeration
Aeration refers to the flow of oxygen within the compost pile. Oxygen is needed by aerobic microorganisms that break down organic matter efficiently. When your compost pile lacks oxygen, anaerobic conditions can develop, leading to slow decomposition and unpleasant odors.
Materials for Aeration
To ensure proper aeration, you will need materials such as PVC pipes, wooden dowels, or metal rods. These materials will create air vents or holes in your compost bin, allowing the free flow of oxygen.
Creating Air Vents or Holes
Depending on the material of your compost bin, you can create air vents or holes at regular intervals. For plastic bins, using a drill with a large bit size, create holes around the sides. Wooden bins can have air vents or holes created by drilling directly into the sides. Metal bins may require welding to install air vents. Make sure the vents or holes are evenly spaced to allow for optimal airflow throughout the compost pile.
Monitoring Temperature
Monitoring the temperature of your compost pile is crucial for successful composting.
Temperature Range for Composting
Composting occurs best within a specific temperature range. Ideally, your compost pile should reach temperatures between 130 and 160 degrees Fahrenheit (54 to 71 degrees Celsius). These temperatures promote the breakdown of organic materials and help to kill weed seeds and harmful pathogens.
Using a Thermometer
To monitor the temperature of your compost, you will need a compost thermometer. Insert the thermometer into the center of the compost pile, avoiding any hard or woody materials. Leave the thermometer in place for a few minutes to allow it to accurately measure the temperature.
Temperature Management
If your compost pile is not reaching the ideal temperature range, you may need to adjust the moisture content or add more nitrogen-rich materials, also known as “green” materials. If the temperature exceeds the optimal range, you can turn the compost pile to introduce fresh air and promote cooling. Monitoring the temperature regularly will help you maintain an optimal environment for composting.
Gathering Composting Tools
To make composting easier and more efficient, gather a few essential tools.
Pitchfork or Garden Fork
A pitchfork or garden fork is essential for turning your compost pile. It helps to mix the materials and introduce fresh oxygen, promoting decomposition. Look for a sturdy fork with sharp tines that can penetrate the compost easily.
Shovel or Spade
A shovel or spade is useful for adding materials to your compost pile. It allows you to transfer organic waste or other compost ingredients efficiently. Choose a shovel with a comfortable handle and a durable blade.
Compost Turner
A compost turner is a specialized tool designed to make compost turning easier. It helps to break up clumps and aerate the compost pile effectively. Consider investing in a compost turner if you have a large compost pile or if you find manual turning challenging.
Compost Thermometer
A compost thermometer is a must-have tool for monitoring the temperature of your compost pile accurately. Opt for a long-stemmed thermometer with a clear, easy-to-read display.
Container for Kitchen Scraps
To collect kitchen scraps for composting, you will need a separate container. Look for a container with a lid that fits well to keep odors contained. It should be easily accessible, ideally with a handle, for convenient transportation to your compost bin.
Preparing the Composting Area
Preparing the composting area properly sets the stage for successful composting.
Selecting an Outdoor Location
Choose an outdoor location for your compost bin that is convenient for adding materials and accessing the finished compost. Locate it away from direct sunlight to prevent excessive evaporation. Consider the proximity to your kitchen for easy transport of kitchen scraps.
Clearing the Area
Before setting up your compost bin, clear the selected area of any debris, rocks, or large roots. This will ensure that there are no obstacles in the way and provide a clean foundation for your compost bin.
Leveling the Ground
For optimal stability, ensure that the ground where your compost bin will be placed is level. Use a shovel or rake to remove any uneven areas or build up low spots with soil.
Choosing a Base Layer
To promote proper drainage and prevent pests from tunneling into your compost pile, consider placing a layer of wire mesh or hardware cloth at the bottom of your compost bin. This will provide a barrier while still allowing for good airflow and drainage.
Layering the Compost Materials
Layering the compost materials in the proper order is essential for efficient decomposition.
Importance of Layering
Layering your compost materials helps to create the right balance of nitrogen and carbon-rich ingredients. It also promotes aeration and moisture control. By layering your compost pile, you help facilitate the breakdown of organic matter and accelerate the composting process.
Green and Brown Materials
Composting requires a mix of “green” and “brown” materials. Green materials include nitrogen-rich items such as fresh grass clippings, kitchen scraps, and green plant waste. Brown materials, on the other hand, are carbon-rich, including dry leaves, straw, wood chips, and shredded paper. Layering these materials ensures the ideal carbon-to-nitrogen ratio for healthy composting.
Adding Organic Waste
When adding organic waste to your compost pile, alternate between layers of green and brown materials. Start with a layer of browns as the base, followed by a layer of greens. Continue to alternate these layers until you have used all your compostable materials.
Moisture Control
Moisture is essential for the decomposition process. Your compost pile should be moist, similar to a damp sponge. Monitor the moisture content regularly, ensuring that it is not too wet or too dry. If it’s too dry, add water. If it’s too wet, mix in dry carbon-rich materials, such as dried leaves or sawdust.
Turning the Pile
To promote airflow and accelerate decomposition, periodically turn your compost pile using a pitchfork or garden fork. Turning the pile every few weeks helps to mix the materials and distribute heat and moisture evenly.
Harvesting the Compost
Knowing when and how to harvest your compost is crucial for obtaining high-quality, nutrient-rich compost.
Compost Maturity
Compost is typically ready for harvest when it has a dark, crumbly texture and an earthy smell. This process can take anywhere from a few months to a year, depending on the materials used and the environmental conditions.
Screening the Compost
To remove any undecomposed materials or large clumps from your finished compost, you can screen the compost. Use a mesh screen or hardware cloth with a fine mesh size to sift out any remaining debris. The sifted compost can then be used in your garden or flower beds.
Storing and Using the Compost
Store your harvested compost in a covered container or bin to protect it from the weather and pests. Make sure the container is well-sealed to retain the compost’s moisture content. You can use the compost as a top dressing, mix it with potting soil for container plants, or use it as a soil amendment in your garden beds. The rich nutrients in the compost will nourish your plants and promote healthy growth.
By following these steps and using the necessary materials, you can create your own compost bin and embark on the journey of turning organic waste into nutrient-rich compost. Happy composting!
