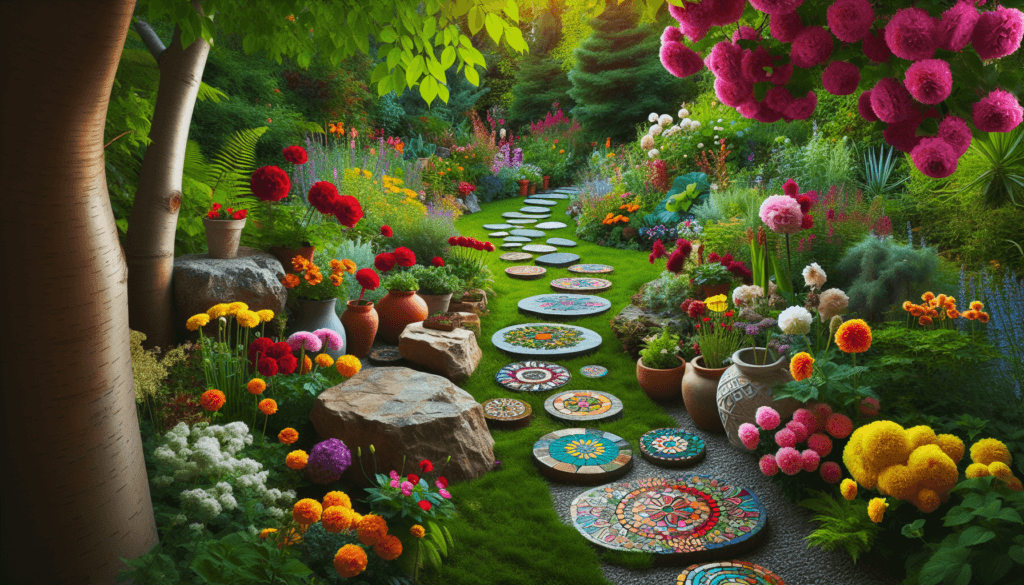
Imagine walking through your garden, stepping on beautifully crafted stepping stones that you made yourself. Not only do these stepping stones add a personal touch to your outdoor space, but they also offer practicality and functionality. Whether you want to create a path through your garden or simply add some decorative elements, this article will provide you with the best ways to incorporate DIY stepping stones in your garden. From choosing the right materials and designs to creating unique patterns and arrangements, you will discover how to transform your garden into a stunning oasis with these simple yet ingenious ideas. So, roll up your sleeves and let’s get crafty to make your garden truly one-of-a-kind.

Choosing the Right Materials
When it comes to creating a beautiful and functional pathway in your garden, choosing the right materials is crucial. There are several options available for DIY stepping stones that you can use to add charm and character to your outdoor space.
Concrete stepping stones
Concrete stepping stones are a popular choice due to their durability and affordability. They are easy to make and can be customized with various embellishments or textures. Concrete stepping stones come in different shapes and sizes, allowing you to create a unique and personalized pathway.
Natural stone stepping stones
If you prefer a more natural and organic look for your garden pathway, natural stone stepping stones are a great option. They are available in various types of stone, such as slate, limestone, or granite. Natural stone stepping stones add a touch of elegance and sophistication to any garden.
Pavers
Pavers are another versatile material choice for creating stepping stones in your garden. They come in a variety of materials, including concrete, clay, or natural stone. Pavers offer a classic and clean look that can easily blend with any garden style. They are also durable and low-maintenance.
Recycled materials
For those who are eco-conscious, using recycled materials for your stepping stones can be a sustainable and creative option. You can repurpose old bricks, tiles, or even glass bottles to create unique and eclectic stepping stones. Not only will you be reducing waste, but you’ll also be adding a unique touch to your garden.
Mosaic tiles
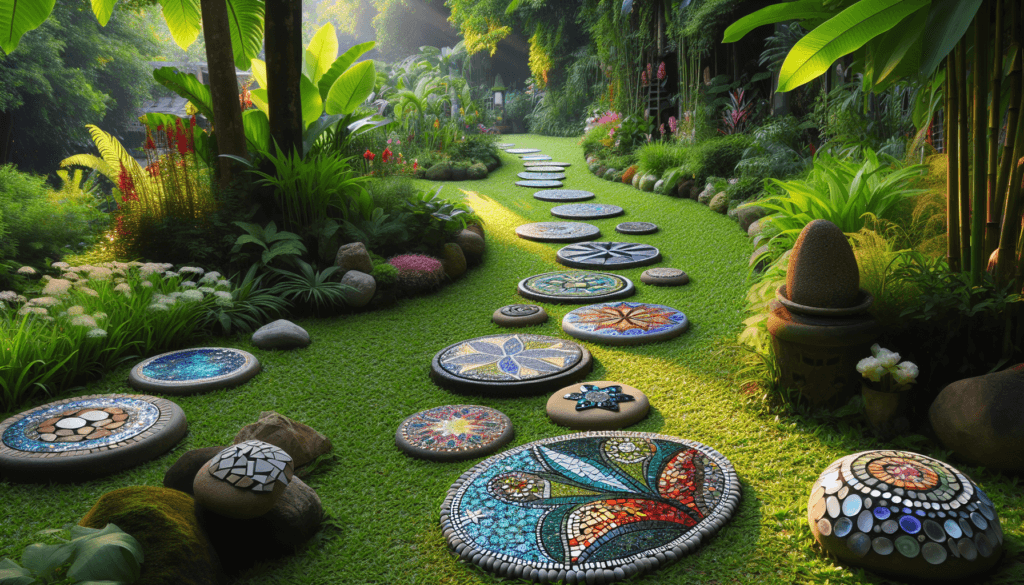
If you want to add a burst of color and whimsy to your garden pathway, mosaic tiles are an excellent choice. They come in various shapes, sizes, and colors, allowing you to create intricate and eye-catching designs. Mosaic tiles can be combined with other materials like concrete or natural stone to create a stunning stepping stone pathway.
Preparing the Ground
Before you start making your own stepping stones, it’s essential to prepare the ground properly. Taking the time to do this step will ensure that your pathway is even, stable, and long-lasting.
Clearing the area
The first step in preparing the ground is to clear the area where you will be placing the stepping stones. Remove any grass, weeds, or debris to create a clean and level surface. This will help prevent any unevenness or instability in your pathway.
Leveling the ground
Next, you’ll want to ensure that the ground is level. Use a shovel or a garden rake to even out any bumps or uneven areas. A level surface will allow your stepping stones to sit flat and make walking on them safe and comfortable.
Creating a base layer
To provide stability and prevent sinking, it’s crucial to create a solid base layer for your stepping stones. You can accomplish this by excavating the ground to a depth of about 4-6 inches. Then, fill the excavated area with a layer of compacted gravel or crushed stone.
Using sand or gravel for stability
After creating the base layer, it’s a good idea to add a layer of sand or gravel on top. This will ensure that the stepping stones have a stable and level surface to sit on. It will also aid in the proper drainage of water, preventing any pooling or erosion.
Designing Your Stepping Stones
Designing your stepping stones is where you can let your creativity shine. There are numerous ways to design and personalize your pathway to suit your style and garden theme.
Planning a pattern
Before you start making your stepping stones, it’s helpful to plan out a pattern for your pathway. You can opt for a traditional or symmetrical design or go for something more whimsical and random. Planning a pattern will help ensure that your stepping stones are evenly spaced and create a cohesive look.
Using stencils or templates
If you’re not confident in your artistic abilities, using stencils or templates can be a great way to create beautiful designs on your stepping stones. There are plenty of pre-made stencils available in various shapes and patterns. Simply place the stencil on top of your stepping stone and fill it in with paint or mosaic tiles.
Incorporating personalized designs
One of the best things about DIY stepping stones is the ability to incorporate personalized designs. You can add handprints, footprints, or even your kids’ artwork to make the pathway truly unique. Personalized designs can add a special touch and become cherished memories in your garden.
Opting for a themed garden
If you have a specific theme for your garden, incorporating it into your stepping stone pathway can enhance the overall ambiance. For example, if you have a tropical garden, you can use seashells or tropical motifs in your stepping stones. A themed garden creates a cohesive and immersive experience for anyone walking through it.
Mixing and matching different shapes and sizes
To add visual interest and depth to your pathway, consider mixing and matching different shapes and sizes of stepping stones. Using a variety of sizes and shapes will create a dynamic and visually appealing pathway. You can alternate large and small stones or combine different shapes like round and square.
Making the Stepping Stones
Once you’ve planned and designed your stepping stones, it’s time to bring them to life. Making your own stepping stones can be a fun and rewarding DIY project that allows you to create unique pieces for your garden.
Using premade stepping stone molds
If you’re looking for a quick and simple way to make your stepping stones, using premade molds is a great option. You can find a wide variety of stepping stone molds in different shapes and sizes at your local home improvement store or online. Simply pour the concrete or mortar mixture into the molds and let them cure.
Creating your own molds
If you want to get more creative and customized with your stepping stones, creating your own molds is a fantastic option. You can use various materials like plastic containers, cake pans, or even cardboard to create unique shapes and sizes. Creating your molds allows you to have complete control over the design and dimensions of your stepping stones.
Mixing concrete or mortar
Regardless of whether you’re using premade molds or creating your own, you’ll need to mix concrete or mortar to pour into the molds. Follow the instructions on the packaging to ensure that you get the right consistency. Pour the mixture into the molds, making sure to fill them completely.
Adding embellishments or textures
To add extra visual interest and texture to your stepping stones, consider adding embellishments or textures. You can embed small pebbles, glass beads, or even seashells into the wet concrete or mortar. This will create a unique and textured surface that adds depth and character to your stepping stones.
Hand-painting or staining the stones
After the stepping stones have cured and are ready to be removed from the molds, you can further customize them by hand-painting or staining them. Use waterproof paint or stain to ensure that the colors stay vibrant and do not fade over time. This is a great opportunity to add intricate designs, patterns, or even personal messages to your stepping stones.
Placing the Stepping Stones
Now that you have your beautifully designed and crafted stepping stones, it’s time to place them in your garden. Proper placement and arrangement of your stepping stones will ensure a functional and visually appealing pathway.
Determining the layout
Before placing the stepping stones, take some time to decide on the layout of your pathway. Consider the overall flow of your garden and how you want people to navigate through it. Determine the most practical and aesthetically pleasing placement for the stepping stones.
Spacing the stones evenly
To ensure a smooth and comfortable walking experience, it’s important to space the stepping stones evenly. Measure the distance between each stone to ensure consistent spacing throughout the pathway. This will also help maintain the visual flow and continuity of your design.
Ensuring proper alignment
As you lay each stepping stone, make sure it is properly aligned with the adjacent stones. This will create a professional and polished look for your pathway. Use a level or a straight edge to check the alignment and make any necessary adjustments.
Creating pathways or focal points
Stepping stone pathways can be more than just a practical way to navigate through your garden. They can also create pathways or focal points that draw attention and lead to specific areas. Consider creating a stepping stone path to a seating area, a water feature, or a gazebo. This will add visual interest and guide people through your garden.
Considering different stepping stone arrangements
Don’t be afraid to experiment with different arrangements for your stepping stones. You can create a straight and linear pathway, a meandering path, or even a spiral design. Mixing up the arrangement of your stepping stones can add an element of surprise and creativity to your garden.
Securing the Stepping Stones
To ensure the longevity and stability of your stepping stone pathway, it’s important to secure the stones in place. Properly securing them will prevent them from shifting or becoming uneven over time.
Embedding the stones in the ground
One of the most common methods of securing stepping stones is by embedding them in the ground. Dig a hole slightly larger than the size of the stone and place it in the hole. Press down firmly to ensure that the stone is level with the ground. Fill in the gaps around the stone with soil or sand to stabilize it.
Using adhesive or mortar for stability
In some cases, embedding the stones may not be enough to secure them in place. If you’re using smaller or lighter stones, applying adhesive or mortar can provide extra stability. Apply a small amount of adhesive or mortar to the bottom of the stone before placing it on the ground. This will help prevent any shifting or wobbling.
Filling gaps between stones
To maintain a clean and professional look, it’s important to fill any gaps between the stepping stones. You can use sand, gravel, or even mortar to fill in the spaces. This will prevent weeds or grass from growing between the stones and ensure a neat and cohesive appearance.
Adding sealant for protection
To protect your stepping stones from the elements and extend their lifespan, consider applying a sealant. A sealant will provide a protective barrier, preventing water damage, staining, or fading. Choose a sealant that is suitable for the material of your stepping stones, whether it’s concrete, natural stone, or mosaic tiles.
Using a rubber mallet for adjustments
If you notice any unevenness or instability in your stepping stones, you can use a rubber mallet to make adjustments. Gently tap the stone in the desired direction to level it or secure it more firmly. Be careful not to apply too much force as it may damage the stone or the surrounding ground.
Maintaining Your Stepping Stones
Once your stepping stones are in place, it’s important to maintain them regularly. Proper maintenance will ensure that your pathway remains safe, attractive, and functional for years to come.
Regular cleaning and sweeping
Regular cleaning and sweeping of your stepping stones will help prevent the buildup of dirt, debris, or moss. Use a broom or a brush to sweep off any leaves, twigs, or other debris. You can also use a hose or a pressure washer to give your stones a thorough cleaning.
Removing weeds and vegetation
To keep your stepping stone pathway looking pristine, it’s crucial to remove any weeds or vegetation that may grow between the stones. Use a hand tool or a weed killer to eliminate any unwanted growth. Regularly checking and removing weeds will help maintain the stability and appearance of your pathway.
Repairing or replacing damaged stones
Over time, your stepping stones may become damaged or cracked. It’s important to repair or replace them promptly to avoid any tripping hazards. If a stone is cracked or broken, carefully remove it and replace it with a new one. Make sure to secure the replacement stone properly to maintain stability.
Applying fresh sealant or paint
To keep your stepping stones looking fresh and vibrant, consider applying a fresh coat of sealant or paint periodically. This will help protect the stones from fading or weathering. Choose a sealant or paint that is suitable for the material of your stepping stones and follow the manufacturer’s instructions for application.
Updating or changing the design periodically
One of the advantages of DIY stepping stones is the ability to update or change the design as desired. Over time, you may want to switch up the patterns, colors, or materials of your stepping stones. This can breathe new life into your garden and allow for continued creativity and personalization.
Enhancing the Stepping Stone Pathway
To further enhance the beauty and functionality of your stepping stone pathway, consider incorporating additional elements into your garden design.
Adding landscape lighting
Installing landscape lighting along your stepping stone pathway can create a magical and inviting atmosphere. It not only adds a safety feature for nighttime use but also highlights the beauty of your pathway. Use solar-powered lights or low-voltage lighting to conserve energy and create an enchanting ambiance.
Planting flowers or greenery alongside
To soften the edges of your stepping stone pathway and add a touch of nature, consider planting flowers or greenery alongside it. Choose plants that complement your garden style and climate. This will create a harmonious and vibrant environment that attracts pollinators and adds visual appeal.
Creating a border or edging
To define and enhance your stepping stone pathway, consider creating a border or edging. You can use materials like bricks, stones, or even plants to create a defined edge. This will provide structure and cohesion to your garden design, making the pathway stand out.
Incorporating decorative elements
To add a personal touch and create visual interest, incorporate decorative elements along your stepping stone pathway. This could include statues, pottery, or even wind chimes. Choose elements that reflect your personality and complement the overall aesthetic of your garden.
Adding seating or a focal point
Consider adding seating or a focal point along your stepping stone pathway to create a destination within your garden. This could be a cozy bench, a colorful garden sculpture, or a small fountain. Having a focal point adds interest and encourages people to stop and enjoy the beauty of your garden.
Combining Stepping Stones with Other Landscaping Features
To create a truly cohesive and integrated garden design, consider combining your stepping stones with other landscaping features.
Integrating stepping stones with a water feature
If you have a water feature in your garden, such as a pond or a fountain, integrating stepping stones can create a harmonious connection. By placing stepping stones over or alongside the water feature, you can create a unique and magical pathway that adds charm and whimsy to your garden.
Using stepping stones to connect different garden areas
Stepping stones can serve as a functional and elegant way to connect different areas of your garden. Whether you want to create a path from the patio to a vegetable garden or from the backyard to a gazebo, stepping stones can guide people through your outdoor space while adding visual interest and cohesion.
Incorporating stepping stones into a rock garden
For those who have a rock garden, incorporating stepping stones can seamlessly blend into the existing design. Use stepping stones to create paths or walkways that wind through the rocks, allowing visitors to explore and appreciate the beauty of your rock garden.
Creating a stepping stone walkway
If you have a large garden or a spacious backyard, creating a stepping stone walkway can be a stunning addition. This involves placing multiple stepping stones in a linear or meandering pattern to create a long walkway that invites exploration and enjoyment of your outdoor space.
Using stepping stones as a path through a vegetable garden
For vegetable garden enthusiasts, using stepping stones as a path through your garden can be an aesthetically pleasing and practical choice. It allows you to navigate through your garden without stepping on the soil or damaging the plants. Stepping stones can also add a touch of charm and beauty to your vegetable garden.
Conclusion
Incorporating DIY stepping stones into your garden is a fantastic way to add function, beauty, and personalization to your outdoor space. With a wide range of material choices, design options, and placement possibilities, you can truly create a unique and inviting pathway. The satisfaction of completing a DIY project and the ability to change and update the design over time make stepping stones a versatile and rewarding addition to any garden. So unleash your creativity, choose the right materials, and start creating a stunning stepping stone pathway that will be enjoyed for years to come.
