Looking to spruce up your garden without breaking the bank? Look no further! In this article, you’ll discover a variety of budget-friendly garden DIY projects that will transform your outdoor space into a stunning oasis. Whether you have a green thumb or are just getting started, there’s something for everyone. From charming container gardens to creative upcycled planters, these projects are not only easy to do but also easy on your wallet. So grab your gardening gloves and get ready to unleash your creativity with these affordable and stylish ideas!

Container Gardening
Container gardening is a fantastic way to bring life and beauty to any space, no matter how small or limited it may be. Whether you have a balcony, tiny patio, or even just a windowsill, container gardening allows you to exercise your green thumb and enjoy the benefits of growing your own plants. Not only is it a fun and rewarding hobby, but it also provides numerous health benefits and can even save you money on your grocery bills. Plus, with a bit of creativity and resourcefulness, you can create unique and stunning container displays that will impress your friends and neighbors.
Creative Container Ideas
When it comes to container gardening, the possibilities are endless. You can use just about anything as a container, as long as it has proper drainage. Think outside the box and unleash your creativity! Old tin buckets, repurposed wine crates, teacups, and even rain boots can all be transformed into unique and eye-catching planters. Look for items around your home or visit local thrift stores and flea markets to find containers with character that will add a touch of whimsy and charm to your garden.
DIY Vertical Garden with Containers
If you’re short on space but still want to maximize your garden’s potential, a vertical garden is a perfect solution. By utilizing wall space or creating a freestanding structure, you can grow a wide variety of plants in a compact and efficient way. One of the easiest methods is using hanging containers, such as plastic bottles or mason jars, attached to a trellis or wall. Simply drill holes in the containers for drainage, fill them with soil, and plant your favorite flowers or herbs. Not only will this create a beautiful display, but it will also save valuable floor space.
Upcycled Container Planters
Gardening doesn’t have to be expensive. In fact, with a bit of creativity and ingenuity, you can turn everyday household items into stunning and functional planters. Upcycling old furniture or repurposing items that would otherwise end up in the trash is not only budget-friendly but also environmentally friendly. For example, an old dresser can be transformed into a vertical planter by removing the drawers and filling each compartment with soil. Or, you can use an old bathtub or sink as a unique and eye-catching planter for a larger display. The possibilities are truly endless when it comes to upcycled container planters.
Raised Beds
If you have a bit more space to work with and want to create a designated area for your plants, raised beds are an excellent option. Raised beds provide better drainage, prevent soil compaction, and make gardening more accessible, especially for those with limited mobility. They also allow you to control the soil quality more effectively, resulting in healthier plants with higher yields. Best of all, you can build your raised beds on a budget, using a variety of cost-effective materials.
Cost-Effective Raised Bed Designs
When it comes to building raised beds on a budget, there are several materials you can consider. One option is using cinder blocks, which are inexpensive and readily available at hardware stores. Simply stack the blocks to your desired height and secure them together with construction adhesive. Another affordable option is using untreated wood, such as cedar or pine planks. You can easily find these at your local lumberyard or even repurpose old pallets. Whichever material you choose, make sure to measure and plan your design beforehand to ensure a sturdy and functional raised bed.
DIY Raised Bed with Recycled Materials
An eco-friendly and budget-friendly option for building raised beds is using recycled materials. Look for old shipping pallets, which can be disassembled and repurposed as the sides of your raised bed. Make sure to choose pallets that are safe and haven’t been treated with toxic chemicals. Another option is using salvaged bricks or stones to create a raised bed border. Visit construction sites or contact local contractors to inquire about any excess materials they may have. By repurposing these materials, you not only save money but also help reduce waste and give new life to discarded items.
Stylish Raised Bed Ideas
Raised beds don’t have to be boring or utilitarian. With a bit of creativity and attention to detail, you can create raised beds that are not only functional but also stylish and visually appealing. Consider adding decorative elements, such as ornamental wrought-iron corners or decorative tiles along the edge. Paint your raised beds in vibrant colors or use a weatherproof stain to enhance the natural beauty of the wood. You can even incorporate trellises or arbors into your raised bed design, creating vertical growing space and adding architectural interest to your garden. Let your imagination run wild and create raised beds that reflect your personal style and taste.
Trellises and Arbors
Trellises and arbors not only provide support to climbing plants but also add vertical interest and structure to your garden. They can transform a boring and plain space into a lush and inviting oasis. Building your own trellises and arbors is not only cost-effective but also allows you to customize the design to fit your specific needs.
DIY Trellis from Bamboo
Bamboo is an excellent material for building trellises due to its strength, flexibility, and affordability. To create a bamboo trellis, start by cutting bamboo poles to your desired height and width. You can use a saw or machete to make clean cuts. Secure the poles together using twine, wire, or metal connectors. For added stability, bury the bottom ends of the poles in the ground or attach them to a sturdy base. As your plants grow, use garden twine or zip ties to train them to climb the bamboo trellis. The result will be a natural and beautiful support structure that blends seamlessly into your garden.
Budget-friendly Arbor Designs
Arbors are a beautiful addition to any garden, providing an elegant entrance or focal point. Building an arbor doesn’t have to break the bank – there are plenty of budget-friendly options available. One option is using PVC pipes as the framework for your arbor. PVC pipes are lightweight, inexpensive, and easy to work with. Simply cut the pipes to size and connect them using PVC connectors or adhesive. Paint the pipe in a color of your choice to add a pop of personality. Another option is repurposing old metal gates or fences as the sides of your arbor. Visit salvage yards or browse online marketplaces to find unique and affordable pieces that will make a statement in your garden.
Upcycled Trellis Ideas
Why buy a trellis when you can repurpose items from around your house for a fraction of the cost? Upcycling is not only budget-friendly but also allows you to get creative and give new life to old items. One idea is using a vintage ladder as a trellis. Lean the ladder against a wall, fence, or even attach it to a raised bed, and weave your plants through the rungs. Another idea is repurposing an old wooden pallet as a wall-mounted trellis. Simply hang the pallet vertically and attach small pots or containers to the slats, filling them with your favorite climbing plants. Get creative with upcycled materials and transform ordinary objects into unique and functional trellises for your garden.
Herb Gardens
Herb gardens are a popular choice for gardeners due to their versatility, fragrance, and culinary uses. No matter how small your space is, it’s always possible to create a thriving herb garden that can provide you with a fresh and flavorful supply of herbs year-round. From small space solutions to vertical planters, there are many creative ways to grow herbs without a large garden.
Small Space Herb Garden DIY
Even if you only have a tiny balcony or windowsill, you can still grow your own herbs. One popular method is using a tiered herb garden. You can easily find tiered plant stands or shelves that are specifically designed for herbs. Simply place the stand in a sunny spot and fill each tier with pots or containers filled with herbs. Another option is using vertical hanging planters. These can be mounted on a wall or railing and are a great space-saving solution. Fill each pocket with soil and your favorite herbs, and watch them thrive in their compact growing space.
Vertical Herb Planter Ideas
Vertical herb planters are not only functional but also add a unique and eye-catching element to your garden. One idea is using a repurposed wooden pallet. Stand the pallet upright and secure it to a wall or fence. Fill each row of slats with soil and plant your herbs in the small openings. Another option is repurposing a shoe organizer. Hang the organizer on a wall or fence and fill each pocket with soil and herbs. This creates a compact and organized herb garden that is as aesthetically pleasing as it is practical. Explore different vertical planter ideas and find the one that suits your space and style best.
Clever Herb Garden Container Hacks
When it comes to growing herbs, you don’t have to limit yourself to traditional pots and containers. Get inventive and repurpose items you already have around your home to create unique and clever herb gardens. For example, old teacups or coffee mugs can be transformed into adorable and whimsical herb planters. Simply drill drainage holes in the bottom, fill them with soil, and plant your herbs. Or, if you have an old colander lying around, use it as a hanging herb garden by attaching chains or ropes to the handles. The colander will not only provide proper drainage but also add a rustic and charming touch to your garden. Don’t be afraid to think outside the box and experiment with different containers for your herbs.

Pallet Projects
Pallets are versatile and inexpensive materials that can be repurposed into various garden projects. From planter boxes to benches and trellises, pallets provide endless opportunities for creative DIY projects that won’t break the bank.
Pallet Planter Boxes
Pallet planter boxes are a fantastic way to add vertical interest and maximize your growing space. Simply disassemble a pallet and use the planks to build a box. Line the inside with landscape fabric to prevent soil from leaking out through the gaps. Fill the box with potting soil and plant your favorite flowers or herbs. Attach the planter box to a wall or fence, or place it on a patio or balcony for a stunning display.
DIY Pallet Garden Bench
Why spend money on outdoor furniture when you can build your own garden bench using pallets? Start by disassembling the pallet and removing any nails or staples. Cut the pallet to your desired length for the bench seat and backrest. Sand down any rough edges and attach the pieces together using screws or nails. For added comfort, you can cut a piece of foam or purchase a seat cushion to attach to the top. Paint or stain the bench to your desired color, and enjoy a stylish and budget-friendly seating option in your garden.
Pallet Trellis and Vertical Garden
Pallets can also be transformed into trellises and vertical gardens. Stand the pallet upright and secure it to a wall or fence. Attach wire mesh or garden netting to the front of the pallet, creating a sturdy and supportive structure for climbing plants. Plant your vines or other climbing plants at the base of the pallet and guide them up through the gaps. As they grow, they will create a lush and beautiful display that adds height and visual interest to your garden.
Garden Pathways
Garden pathways not only provide a practical way to navigate through your garden but also add visual appeal and structure to your outdoor space. From gravel paths to stepping stone designs, there are plenty of budget-friendly options to choose from when creating your own garden pathway.
Gravel Pathway Design
A gravel pathway is a classic and affordable choice for any garden style. Start by marking out the desired path using string or hose. Remove any grass or weeds from the area and level the ground. Next, lay down a landscape fabric to prevent weeds from growing through the gravel. Pour a layer of gravel over the fabric, making sure it is even and compact. Use a rake or shovel to spread the gravel evenly and create a smooth surface. As you walk on the path, the gravel will compact further, providing a stable and attractive pathway.
Stepping Stone Path DIY
Stepping stone pathways add a charming and natural element to your garden. Begin by laying out the desired path using a garden hose or string. Dig a shallow trench along the path, making sure it is wide enough to accommodate the stepping stones. Place the stones in the trench, leaving a small gap between each one. Use a level to make sure they are even and stable. Backfill any gaps with sand or gravel to provide stability and prevent shifting. Stepping stone pathways are not only budget-friendly but also allow you to add a personal touch by choosing stones in different shapes, sizes, and colors.
Recycled Materials Path Ideas
Creating a garden pathway doesn’t have to involve purchasing new materials. In fact, you can create unique and eco-friendly paths using recycled materials found around your home. For example, old bricks or pavers can be repurposed as stepping stones or even laid out in a herringbone pattern for a more intricate design. Broken concrete pieces, often referred to as “urbanite,” can be used to create a mosaic-like pathway. Simply arrange the broken pieces in a desired pattern, leaving enough space between each piece for stability. Fill the gaps with sand or soil, and watch as your recycled materials transform into a beautiful and functional garden path.

Water Features
Water features add a soothing and tranquil element to any garden. The sound of flowing water can create a sense of peace and relaxation, turning your outdoor space into a serene retreat. Building your own water feature doesn’t have to be complicated or expensive – there are plenty of budget-friendly options to choose from.
DIY Solar Powered Fountain
A solar-powered fountain is not only environmentally friendly but also cost-effective. Begin by choosing a container for your fountain, such as a large ceramic pot or a repurposed water feature. Drill a hole in the bottom of the container, making sure it is large enough to accommodate the water pump tubing. Insert the pump into the hole and attach the tubing. Place the container in a sunny spot in your garden, and fill it with water. The solar panel will power the pump, creating a beautiful and continuous flow of water. Sit back, relax, and enjoy the soothing sound of your DIY fountain.
Budget-friendly Pond Ideas
If you’re dreaming of a pond in your garden but don’t want to spend a fortune, there are several budget-friendly options to consider. One option is using a preformed pond liner, readily available at garden centers and online. Dig a hole in your desired location, making sure it is deep enough to accommodate the liner. Place the liner in the hole, making sure it is level and secure. Backfill any gaps with soil and fill the pond with water. Finish off the edges with stones or plants to create a natural and integrated look. Another option is using a flexible pond liner, which provides more design freedom and can be shaped to fit any space. Whichever option you choose, a pond will add beauty and tranquility to your garden without breaking the bank.
Upcycled Water Feature Projects
Upcycling materials to create a unique water feature not only saves money but also adds a touch of creativity and charm to your garden. For example, an old wine barrel can be transformed into a rustic and charming water feature. Fill the barrel with water and add a small recirculating pump, which can be purchased at a garden supply store. Attach a spout or create a waterfall using rocks or decorative elements. Another idea is repurposing an old galvanized tub or trough as a water feature. Simply attach a submersible pump and add water to create a relaxing and visually appealing display. Let your imagination run wild and explore different upcycled materials to create a one-of-a-kind water feature that will become the focal point of your garden.
Garden Lighting
Garden lighting is essential for extending the enjoyment of your outdoor space into the evening hours. It not only adds warmth and ambiance but also provides safety and security. There are numerous budget-friendly options for illuminating your garden, from solar-powered lights to creative DIY lanterns.
DIY Solar Lights
Solar lights are an excellent choice for garden lighting as they are not only energy-efficient but also cost-effective. There are various DIY solar light projects that you can easily create to suit your garden’s style and needs. For example, you can upcycle glass jars by adding solar-powered lids or inserting small solar lights into the jars. Hang them from trees or hooks to create an enchanting and whimsical atmosphere. Another idea is using outdoor solar fairy lights. String them through your garden beds, wrap them around trees or trellises, or even drape them along fences or pergolas. These small and inexpensive lights will bring a magical glow to your garden without increasing your electricity bill.
Creative Outdoor Lantern Ideas
Outdoor lanterns are a versatile and stylish option for garden lighting. They come in a variety of shapes, sizes, and materials, allowing you to find the perfect lanterns to suit your garden’s aesthetic. Consider repurposing old mason jars or tin cans by adding candles or solar-powered lights. Hang them from hooks or place them on tables or stakes to create a cozy and inviting atmosphere. Or, if you’re feeling crafty, create your own lanterns using materials such as wire, glass bottles, or driftwood. Not only will these lanterns provide soft and warm lighting, but they will also add a decorative element to your garden.
Budget-friendly Fairy Garden Lighting
Creating a fairy garden is a delightful and magical way to add whimsy and charm to your outdoor space. Lighting is a crucial element in bringing these miniature gardens to life, creating a cozy and enchanting atmosphere. Luckily, there are plenty of budget-friendly options available. For example, you can use tiny battery-operated LED string lights to illuminate your fairy garden. Wrap them around trees, plants, or fairy houses to bring a magical sparkle to your display. Another idea is using small solar-powered garden stakes, shaped like mushrooms or butterflies, to provide a glowing effect at night. Place these stakes strategically throughout your fairy garden to create a whimsical and enchanting atmosphere. Let your imagination soar and create a fairy garden lighting display that will transport you to a magical world.

Composting
Composting is not only an eco-friendly way to reduce waste but also an excellent way to nourish your garden with natural and nutrient-rich soil. It’s a simple and cost-effective process that turns your kitchen scraps and yard waste into “black gold” for your plants. With a few DIY techniques, you can create your own compost bin and start reaping the benefits of this organic fertilizer.
DIY Compost Bin
Building your own compost bin is a budget-friendly and straightforward process. Start by choosing a location in your garden that is easily accessible. One simple method is constructing a compost bin using wooden pallets or planks. Create a square or rectangular shape by securing the planks together with screws or nails. Leave gaps between the planks to allow airflow. Another option is repurposing a large plastic container, such as a trash bin or storage bin, by drilling holes in the sides and bottom for ventilation. Whichever method you choose, make sure to layer your compost materials properly, alternating between green (nitrogen-rich) and brown (carbon-rich) matter. Periodically turn the compost with a pitchfork or shovel to aerate it and accelerate the decomposition process. Before you know it, you’ll have nutrient-rich compost to use in your garden.
Vermicomposting on a Budget
Vermicomposting, or composting with worms, is a fantastic option for those with limited outdoor space or who want to speed up the composting process. To start vermicomposting on a budget, all you need is a plastic storage bin with a lid, some newspaper or shredded cardboard, and red worms, also known as composting worms. Drill holes in the bin for ventilation and drainage. Add a layer of moistened newspaper or shredded cardboard as bedding, and then introduce the worms to your bin. You can easily purchase red worms from gardening supply stores or online. Feed them with kitchen scraps and yard waste, avoiding any meat, dairy, or oily foods. The worms will do the rest, turning your organic waste into nutrient-rich worm castings, also known as “black gold.” Vermicomposting is not only budget-friendly but also an excellent way to teach kids about the importance of recycling and the natural process of decomposition.
Upcycled Compost Container
When it comes to composting, you don’t have to spend a lot of money on fancy bins or containers. In fact, you can create a functional and attractive compost container by repurposing items you already have at home. For example, a large plastic storage tote with a lid can be transformed into a compost container by drilling holes in the sides and bottom for ventilation. Place the bin on a small pallet or bricks to allow air to circulate underneath. Another idea is using an old metal garbage can with a lid. Drill holes in the sides and bottom for ventilation and place the can on a sturdy base. The lid will help contain odors and keep pests out. By repurposing these items, you not only save money but also give new life to discarded objects and practice sustainable living.
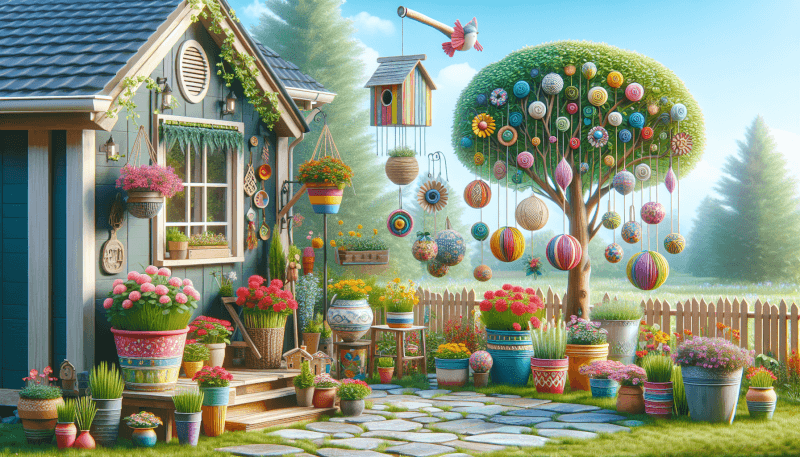
Garden Decor
Garden decor is the finishing touch that brings your outdoor space to life. From DIY signs and recycled garden art to budget-friendly yard ornaments, there are endless opportunities to personalize your garden and reflect your style and personality.
DIY Garden Signs
Garden signs are a fun and creative way to add personality and character to your outdoor space. They can be as simple or elaborate as you like, depending on your crafting skills and personal preference. One easy option is painting stones or pebbles with outdoor paint, creating small and whimsical signs. Another idea is repurposing old wooden fence boards or pallets. Sand them down and paint them with weather-resistant paint, or use stencils to create unique designs or quotes. Attach the signs to garden stakes or hang them from tree branches or fences. Let your imagination run wild and create personalized garden signs that reflect your style and add a touch of charm to your outdoor space.
Recycled Garden Art
Using recycled materials to create garden art not only saves money but also reduces waste and adds a unique and whimsical touch to your garden. One idea is repurposing old bicycle wheels or parts as garden sculptures. Arrange them in your garden beds or hang them from trees or fences for an eye-catching display. Another option is using old dishes or ceramics to create mosaic stepping stones or planters. Break the dishes into smaller pieces and arrange them in different patterns or designs, then attach them to concrete or ceramic bases. These recycled garden art pieces are not only visually appealing but also a great conversation starter.
Budget-friendly Yard Ornaments
Garden ornaments add a touch of personality and charm to your outdoor space. Luckily, there are many budget-friendly options to choose from or create yourself. One option is repurposing old birdcages as decorative elements. Fill them with small potted plants, candles, or other decorative items, and hang them from trees or pergolas. Another idea is using recycled wine bottles as garden stakes or edging. Simply bury the bottles upside down in the ground, leaving only the neck exposed. The colorful bottles will catch the sunlight and add a whimsical touch to your garden. Visit thrift stores, flea markets, or yard sales to find unique and affordable yard ornaments, or get creative and repurpose items you already have. With a bit of imagination, you can transform your garden into a personalized and enchanting outdoor oasis.
In conclusion, creating a beautiful and vibrant garden doesn’t have to come with a hefty price tag. By utilizing budget-friendly DIY projects and repurposing materials, you can bring your garden to life while saving money and reducing waste. From container gardening and raised beds to trellises, herb gardens, and garden decor, there are countless opportunities to unleash your creativity and transform your outdoor space. So grab your gardening gloves, roll up your sleeves, and get ready to enjoy the rewards of your hard work in a stunning and budget-friendly garden.

