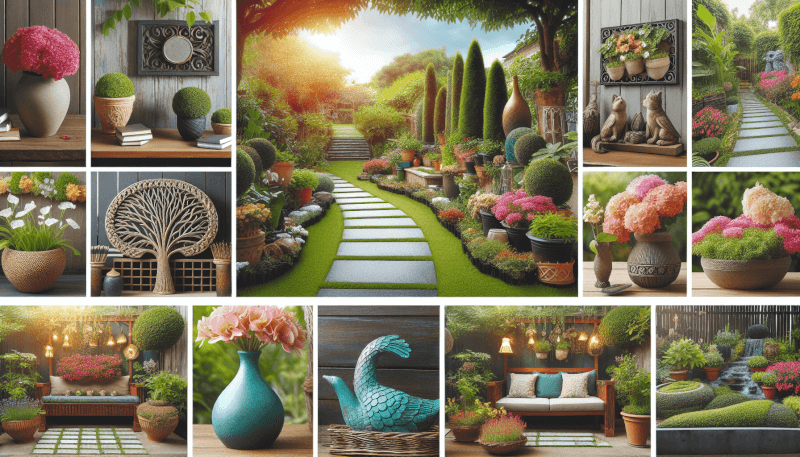
Transform your garden into a captivating oasis with these creative DIY projects that will boost its curb appeal. Whether you have a spacious backyard or a small balcony, these simple yet effective ideas will breathe new life into your outdoor space. From crafting your own miniature fairy garden to repurposing old household items into charming planters, these projects are not only fun and easy to do but also a great way to personalize your garden and make it truly shine. Get ready to unleash your creativity and create a garden that will leave your neighbors in awe.
Outdoor Lighting
Create a DIY Outdoor Lantern
Are you looking to add a touch of warm and inviting ambiance to your outdoor space? Creating your own DIY outdoor lantern is a perfect way to achieve just that. With a few simple materials and some creativity, you can design a lantern that beautifully illuminates your garden during those cozy evenings. One popular option is using a mason jar as the base of the lantern. Simply insert a candle or fairy lights inside the jar, and you instantly have a charming and rustic light source. Another idea is to repurpose old tin cans by punching holes in them to create interesting patterns.
Install Solar-Powered Fairy Lights
If you’re a fan of fairy lights and want to add a touch of magic to your garden, installing solar-powered fairy lights is a great option. These lights are not only energy-efficient, but they also eliminate the need for electrical wiring, making installation a breeze. Simply place the solar panel in a spot that receives ample sunlight during the day, and let the lights automatically come to life as the sun sets. String them along a fence, weave them through tree branches, or hang them from pergolas to create a whimsical and enchanting atmosphere.
Design and Build a Garden Chandelier
For those looking to make a statement with their outdoor lighting, designing and building a garden chandelier is the perfect project. A chandelier can serve as a focal point in your garden, adding a touch of elegance and sophistication. You can create a chandelier using a variety of materials such as small glass jars, crystal beads, or even repurposed wine bottles. Attach these materials to a sturdy frame, add your choice of LED candles or small light bulbs, and hang the chandelier from a tree branch or pergola. It’s a sure way to create a captivating and inviting garden space.
Vertical Gardens
Construct a Vertical Pallet Planter
If you have limited space but still want to enjoy the beauty of a flourishing garden, constructing a vertical pallet planter is an excellent solution. Pallets can be easily transformed into a vertical garden by attaching pots or planters to the pallet’s slats. This allows you to grow a wide variety of plants vertically, utilizing the height of your garden area. You can paint the pallet in vibrant colors or leave it in its natural state for a rustic look. Hang the pallet on a wall or prop it against a fence, and watch as your garden blooms in a unique and space-saving way.
Build a Hanging Basket Garden
Hanging basket gardens are a great way to add vertical dimension and a burst of color to your garden. By selecting a variety of hanging baskets and filling them with your favorite flowers or herbs, you can create a visually stunning display. Consider incorporating trailing plants for added interest and depth. Hang the baskets from pergolas, tree branches, or hooks mounted on walls or fences. This vertical garden idea is not only aesthetically pleasing but also practical for those with limited ground space.
Make a Wall-Mounted Herb Garden
Fresh herbs can elevate any dish, and what better way to have them readily available than by creating a wall-mounted herb garden? This DIY project combines functionality with beauty. Start by selecting a suitable wall space and attaching wooden boards or pallets to create a frame. Then, attach small pots or containers to the boards, ensuring they have adequate drainage. Fill the pots with your favorite herbs, such as basil, mint, and rosemary. Not only will this herb garden add a touch of greenery to your outdoor space, but it will also make cooking more convenient and delicious.

Recycled Garden Art
Transform Old Tires into Flower Planters
Looking to add a unique and eco-friendly touch to your garden? Transforming old tires into flower planters is a creative and sustainable solution. Start by cleaning the tires thoroughly and painting them in vibrant colors or patterns. Then, fill the tires with soil and plant flowers or decorative grasses. You can stack the tires to create a visually interesting display or place them individually throughout your garden. This project not only reduces waste but also adds a playful and unexpected element to your outdoor space.
Repurpose Wine Bottles as Garden Borders
Wine bottles can be repurposed in various ways, and using them as garden borders is a fantastic option. Begin by collecting empty wine bottles in various colors. Dig a shallow trench along the edge of your garden bed, ensuring it is straight and level. Press the bottles neck-down into the soil, staggering the colors for a visually pleasing effect. The wine bottles act as both a decorative border and a barrier, preventing soil erosion and keeping your garden neatly defined. This project adds a touch of sophistication and eco-consciousness to your garden.
Create Whimsical Garden Decorations from Salvaged Metal
Salvaged metal pieces can be transformed into whimsical garden decorations that add personality and charm to your outdoor space. Look for old metal chairs, bicycle wheels, or even discarded tools. Give them a thorough cleaning and coat of paint to protect against rust. Then, let your imagination run wild as you repurpose these items into garden art. Use the metal chairs as plant stands, hang the bicycle wheels from trees and fill them with flowers, or create a unique sculpture from the salvaged tools. These one-of-a-kind pieces will undoubtedly become conversation starters and bring a smile to anyone who visits your garden.
Repainted Furniture
Revamp Old Chairs with Vibrant Paint Colors
If your garden furniture is starting to look worn and neglected, a fresh coat of paint can bring it back to life. Revamp old chairs by selecting vibrant paint colors that complement your garden’s aesthetic. Start by thoroughly cleaning the chairs and sanding any rough areas. Apply a primer to ensure the paint adheres properly, then paint the chairs in your chosen color. Consider using bold, eye-catching hues that stand out against the greenery of your garden. Complete the transformation by adding colorful cushions or pillows for added comfort and style.
Transform a Wooden Bench with Stencils and Patterns
Wooden benches offer a classic and timeless seating option in any garden. To give your bench a unique and personalized touch, consider using stencils and patterns to transform its appearance. Start by sanding the bench to create a smooth surface, ensuring that all dirt and debris are removed. Then, select a stencil design or create your own using stenciling sheets. Secure the stencil in place and apply paint using a brush or sponge. Repeat the process until the desired pattern is achieved. This DIY project allows you to add a pop of personality to your outdoor seating area.
Give Your Garden Table a Fresh Coat of Paint
If your garden table is looking dull and lackluster, a fresh coat of paint can make a world of difference. Choose a paint color that complements the overall aesthetic of your garden. Clean the table thoroughly and sand any rough areas. Apply a primer to ensure the paint adheres properly, then apply the paint in smooth and even strokes. Consider adding a protective sealant to safeguard the paint from the elements. Your garden table will once again become a focal point, inviting friends and family to gather and enjoy the beauty of your outdoor space.
Decorative Pathways
Install a DIY Stone Walkway
Creating a stone walkway not only serves a practical purpose but also adds charm and elegance to your garden. Start by planning the layout of your walkway, considering the size and shape of the stones you want to use. Dig a trench along the desired path, making sure it is level. Fill the trench with gravel to provide a solid base for the stones. Then, place the stones in the desired pattern, ensuring they are level and securely in place. Fill the gaps between the stones with gravel or sand for a finished look. This DIY project will guide visitors through your garden while adding a touch of sophistication.
Create a Pebble Mosaic Path
For those looking to add an artistic and whimsical element to their garden pathways, creating a pebble mosaic path is an excellent choice. Start by sketching out your desired design on paper. Lay out the design on the ground using a combination of pebbles, rocks, and gravel. Arrange the materials in a way that brings your design to life, ensuring each piece is securely in place. Once you’re satisfied with the layout, secure the pebbles with adhesive or grout. Allow the mosaic to dry completely before using it as a pathway. This DIY project will undoubtedly become a focal point and conversation starter in your garden.
Make a Colorful Brick Path
Brick paths are timeless and add a sense of warmth and character to any garden. To create a colorful brick path, start by selecting bricks in various shades and colors. Lay them out on a flat surface in the desired pattern. Once you’re satisfied with the arrangement, mark the location of each brick and remove them. Dig a trench along the path, making sure it is level. Add a layer of sand to provide a stable base for the bricks. Place the bricks back in their designated spots, ensuring they are level and securely in place. Fill the gaps between the bricks with sand or soil, allowing grass or moss to grow for a more natural look. This DIY project will bring charm and vibrancy to your garden pathways.
Unique Planters
Turn Vintage Suitcases into Plant Containers
If you’re a fan of repurposing vintage items, why not turn old suitcases into unique plant containers? Start by selecting suitcases in various sizes, shapes, and colors that match your garden’s aesthetic. Clean the suitcases thoroughly and ensure they are water-tight. Fill them with a suitable growing medium and plant flowers, ferns, or succulents of your choice. Arrange the suitcases in an attractive display, such as stacking them or placing them at different heights. This DIY project adds a touch of nostalgia and serves as a conversation piece in your garden.
Repurpose Old Boots as Quirky Planters
Give your garden a playful and whimsical touch by repurposing old boots as planters. Whether you have rain boots, cowboy boots, or even high heels, they can be given a new lease on life in your garden. Ensure the boots are clean and free of any holes that could compromise their ability to hold soil and water. Fill the boots with a suitable growing medium and add flowers or trailing plants for an eye-catching display. Place the boots strategically throughout your garden, either on the ground or elevated on a table or shelf. This DIY project adds a touch of personality and fun to your outdoor space.
Transform Tin Cans into Charming Flower Pots
If you’re looking for a budget-friendly and eco-conscious way to add more planters to your garden, transforming tin cans into charming flower pots is the perfect solution. Start by cleaning the cans thoroughly and removing any sharp edges. Paint the cans in your desired colors, incorporating patterns or designs for added visual interest. Once the paint has dried, drill drainage holes in the bottom of the cans. Fill them with soil and plant your favorite flowers or herbs. Place the tin can planters on tables, hang them from hooks, or even nail them to a fence. This DIY project allows you to add a personalized touch to your garden while reducing waste.
DIY Garden Signs
Make Custom Wooden Signs with Inspirational Quotes
Adding custom wooden signs with inspirational quotes is a wonderful way to infuse positivity and motivation into your garden. Start by selecting a suitable piece of wood, such as a reclaimed plank or a wooden board. Sand the surface to create a smooth canvas for your design. Stencil or freehand paint your chosen quote onto the wood, using weather-resistant paint or markers. Consider personalizing the sign by incorporating decorative elements or painting it in vibrant colors. Once the paint is dry, seal the wood with a protective coating to ensure durability in your outdoor space. This DIY project will not only uplift your garden but also inspire and delight anyone who visits.
Design and Paint Personalized Garden Nameplates
Personalized garden nameplates are a lovely way to add a personal touch to your outdoor space. Start by selecting a suitable material for your nameplate, such as wood, metal, or ceramic tiles. Decide on the design and layout of the nameplate, considering the font, color, and size of the letters. Use stencils or freehand paint your name or any other desired text onto the material. Add decorative elements such as flowers or vines to enhance the design. Once the paint is dry, seal the nameplate with a protective coating to ensure it withstands outdoor conditions. Mount the nameplate on a post or attach it to a fence or gate to proudly display your personalized garden sign.
Create Rustic Garden Signposts from Reclaimed Wood
For those seeking a rustic and charming addition to their garden, creating signposts from reclaimed wood is a wonderful DIY project. Start by sourcing weathered pieces of wood, such as old fence posts, driftwood, or salvaged planks. Clean the wood and ensure it is sturdy and free of any rot. Sand the surface to smooth out any rough areas and enhance the wood’s natural character. Paint or burn your desired text onto the wood, whether it be directions to different areas of your garden or the names of different plant varieties. Insert the signposts into the ground, making sure they are secure. These rustic signposts will add a touch of whimsy and guidance to your garden.
Outdoor Furniture
Build a DIY Outdoor Bar with Pallets
If you enjoy entertaining outdoors and want to create a gathering space, building a DIY outdoor bar with pallets is a fantastic project. Pallets offer a versatile and cost-effective material for construction. Decide on the size and layout of your bar, ensuring it fits your available space. Begin by cleaning and sanding the pallets to create a smooth surface. Secure them together to form the frame of the bar using nails or screws. Add a countertop using plywood or reclaimed wood, ensuring it is level and securely attached. Paint or stain the bar in your desired color or finish. Complete the bar by adding shelving for storage and hooks for hanging glasses or utensils. This DIY project will transform your outdoor space into a functional and stylish entertaining area.
Construct a Pergola for a Relaxation Area
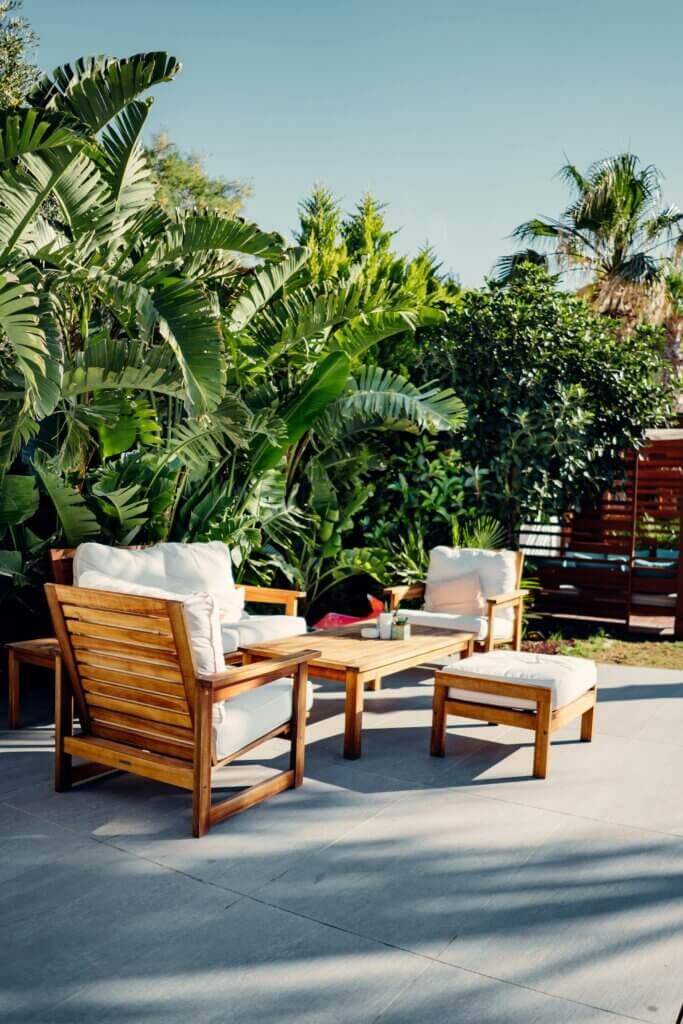
A pergola creates an inviting and shaded retreat in your garden, perfect for relaxing and enjoying the beauty of nature. Begin by selecting a suitable location for the pergola, considering factors such as sunlight exposure and proximity to other garden features. Determine the desired size and shape of the pergola, as well as the type of materials you want to use, such as wood or metal. Follow the appropriate construction plans or consult a professional if needed. Once the structure is in place, consider adding climbing plants such as wisteria or jasmine to create a natural canopy. Add comfortable seating and decorative elements, such as string lights or curtains, to complete your relaxation area. This DIY project will provide a tranquil and inviting space within your garden.
Create a Cozy Outdoor Bench with Cinder Blocks
If you’re looking for a cost-effective and easy-to-build outdoor seating option, creating a cozy bench with cinder blocks is a great choice. Begin by determining the desired size and shape of the bench, as well as the number of cinder blocks and wooden planks needed. Lay out the cinder blocks in the desired configuration, ensuring they are leveled and evenly spaced. Place the wooden planks on top of the cinder blocks, forming the seating area. Secure the planks to the cinder blocks using construction adhesive or brackets. For added comfort, consider adding cushions or pillows to the bench. This DIY project will provide a practical and stylish seating option for your garden.

Water Features
Build a DIY Water Fountain
Water features add a soothing and serene atmosphere to any garden, and building a DIY water fountain is easier than you might think. Begin by selecting a suitable location for the fountain, considering factors such as visibility and access to a power source. Determine the size and design of the fountain, whether you prefer a classic tiered design or a modern sculpture. Purchase or repurpose a water pump suitable for your chosen design and place it in a reservoir or basin. Arrange the water elements, whether they be tiered bowls, rocks, or sculptures, around the pump. Connect the pump to a power source and adjust the flow of water to your liking. This DIY project will add a sense of tranquility and beauty to your garden.
Create a Tranquil Pond with Water Plants
If you have the space and desire to create a more elaborate water feature, consider building a tranquil pond in your garden. Begin by selecting a suitable location for the pond, ensuring it receives an appropriate amount of sunlight and is away from overhanging trees. Mark the shape of the pond on the ground using a hose or rope. Excavate the area, removing rocks, roots, and debris. Line the hole with a pond liner or waterproof membrane, ensuring it covers the entire excavation area. Fill the pond with water and add aquatic plants such as water lilies or water irises. Consider adding rocks, pebbles, or decorative statues to enhance the aesthetic appeal. This DIY project will create a serene and natural focal point in your garden.
Construct a Decorative Rain Chain
Rain chains are a beautiful and functional alternative to traditional downspouts. They guide the flow of water in a decorative manner, adding visual interest to your garden during rainfall. Begin by selecting a suitable material for your rain chain, such as copper, brass, or even repurposed objects like seashells or glass bottles. Determine the desired length and layout of the rain chain, considering factors such as the slope of your roof and the location of the desired water collection area. Attach the rain chain to your gutter system, ensuring it securely hangs in place. As rainwater flows down the chain, it will create a mesmerizing and soothing effect. This DIY project will add an artistic and functional element to your garden.
Colorful Plant Markers
Craft DIY Plant Labels with Painted Stones
Keeping track of your plants is essential, and crafting DIY plant labels with painted stones is a fun and creative way to do so. Begin by collecting smooth stones of various shapes and sizes. Wash and dry the stones, ensuring they are free of any dirt or debris. Paint each stone with a waterproof paint or marker, allowing them to dry completely between coats. Write or draw the names of your plants on each stone, using a contrasting color to ensure readability. Place the painted stones next to their corresponding plants in your garden, or attach them to stakes and insert them into the soil. This DIY project adds a colorful and personalized touch to your garden while keeping your plants organized.
Make Herb Markers from Vintage Spoons
If you enjoy having an herb garden and want to add a touch of charm and nostalgia, making herb markers from vintage spoons is a perfect choice. Begin by selecting vintage spoons that are no longer in use or can be sourced from thrift stores. Clean the spoons thoroughly and ensure they are dry. Engrave or stamp the name of each herb onto the handle of the spoon, or use a waterproof paint or marker. Attach the spoon herb markers to stakes, skewers, or thin pieces of wood. Place them next to your herbs, ensuring they are easily visible. This DIY project combines practicality with vintage elegance, enhancing the beauty of your herb garden.
Design Colorful Flags for Vegetable Garden Beds
If you have a vegetable garden and want to add a whimsical and eye-catching element, designing colorful flags for vegetable garden beds is a fantastic option. Begin by selecting durable and weather-resistant fabric in various vibrant colors. Cut the fabric into flag shapes, ensuring they are large enough to be noticed but not too large to overpower the plants. Use fabric markers or paint to write the names of each vegetable or create fun designs on the flags. Attach the flags to stakes and place them at the beginning of each garden bed, ensuring they are elevated for visibility. This DIY project adds a playful and informative touch to your vegetable garden.
In conclusion, these creative DIY projects offer a wide range of options for enhancing the curb appeal of your garden. Whether you’re looking to add lighting, vertical gardens, recycled art, repainted furniture, decorative pathways, unique planters, garden signs, outdoor furniture, water features, or colorful plant markers, there’s a project for every style and preference. Get ready to unleash your creativity, elevate your garden’s aesthetic, and enjoy the satisfaction of bringing personalized touches to your outdoor space. Happy DIY gardening!

