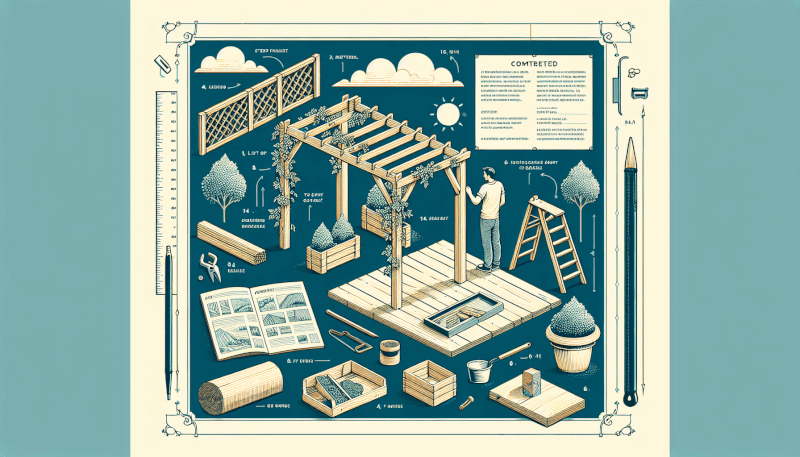
If you’ve been dreaming of adding a touch of elegance and functionality to your garden, a garden arbor or pergola might be just what you need. With our DIY guide, you can bring your vision to life and create the perfect structure to enhance your outdoor space. Whether you’re looking for a cozy spot to relax in the shade or a stunning focal point for your yard, this guide will walk you through the process, making it accessible and enjoyable for even the most novice DIY enthusiast. Get ready to transform your garden and start enjoying the beauty of your own handmade arbor or pergola.
Materials Needed
Wood
One of the primary materials you will need for building a garden arbor or pergola is wood. This versatile material can be used for the frame, posts, and decorative trim. When choosing wood, consider the durability and weather resistance of different types such as cedar or redwood.
Concrete
Concrete is essential for creating a strong foundation for your garden arbor or pergola. It will provide stability and prevent shifting or sinking over time. You will need concrete for the footings or post anchors, depending on the foundation type you choose.
Tools and Equipment
To successfully complete your DIY garden arbor or pergola project, you will need a variety of tools and equipment. Some common tools include a circular saw for cutting wood, a drill for making holes and assembling components, and a level for ensuring everything is straight and even. Other tools, such as a tape measure, clamps, and a miter saw, may also be beneficial.
Fasteners and Hardware
Fasteners and hardware are essential for securely joining the different components of your garden arbor or pergola. Examples include screws, nails, brackets, and post anchors. Make sure to choose the appropriate types and sizes based on the materials you are using.
Optional Accessories
To personalize your garden arbor or pergola and enhance its functionality, you may consider adding optional accessories. These could include decorative elements like finials or lattice caps, as well as practical features such as benches or hooks for hanging plants or lights.
Choosing a Design
Arbor vs Pergola
The first decision you need to make when planning your garden structure is whether you want to build an arbor or a pergola. Arbors are typically smaller and focus on creating an entryway or focal point in the garden, while pergolas are larger and offer a shaded area for relaxation or outdoor dining. Consider the purpose and scale you envision for your structure before moving forward.
Size and Placement
Before starting your project, it’s important to consider the size and placement of your garden arbor or pergola. Measure the space available in your garden and determine how much coverage or shade you desire. You may also need to check local building codes or homeowner association guidelines to ensure compliance with any regulations regarding size and placement.
Style and Aesthetic
Take some time to explore different styles and aesthetics to find a design that aligns with your taste and complements your garden. Whether you prefer a rustic, modern, or traditional look, there are countless design options available. Consider factors like the shape of the roof, the type of lattice, and any decorative trim or details that will enhance the overall visual appeal.
Functional Considerations
When designing your garden arbor or pergola, it’s important to consider functionality. Think about how you plan to use the structure and any specific features that would enhance its purpose. For example, if you enjoy outdoor dining, you may want to consider adding a table or built-in seating. If privacy is a concern, you can incorporate trellises or plant climbing vines to create a natural screen.

Preparing the Site
Checking Local Building Codes
Before starting any construction project, it’s crucial to check your local building codes or homeowner association guidelines. These regulations may dictate factors such as height restrictions, setback requirements, or the need for permits. Familiarize yourself with the rules and ensure compliance to avoid any future issues.
Marking the Area
Once you have determined the size and placement of your garden arbor or pergola, mark the area where the structure will be built. Use string, stakes, or paint to clearly outline the perimeter. This will serve as a visual guide during clearing and leveling.
Clearing the Ground
Before starting the construction process, it’s important to clear the ground where your garden arbor or pergola will be located. Remove any plants, rocks, or debris that may interfere with the foundation or construction process. Clearing the ground will provide a clean and stable surface to work on.
Leveling the Site
After clearing the ground, it’s essential to ensure that the site is level. Use a level and a long straight board or string to check for any slopes or unevenness. If necessary, you may need to add or remove soil to achieve a level surface. This step is crucial to ensure the structural integrity and stability of your garden arbor or pergola.
Installing Gravel Base (Optional)
In some cases, you may choose to install a gravel base to further stabilize your garden arbor or pergola. This step is particularly useful if the ground is prone to erosion or if you want to enhance drainage. Spread a layer of gravel evenly over the cleared and leveled area, ensuring it is compacted and provides a sturdy foundation.
Building the Foundation
Choosing the Foundation Type
When constructing your garden arbor or pergola, you have different options for the foundation type. The most common choices are either concrete footings or post anchors. Concrete footings involve digging holes and pouring concrete, providing a solid and permanent foundation. Post anchors, on the other hand, are often used for smaller structures and offer easier installation and flexibility.
Digging Holes
If you opt for concrete footings as the foundation for your garden arbor or pergola, you will need to dig holes at the predetermined locations. Use a post-hole digger or an auger to ensure the holes are deep enough to provide stability. The size and depth of the holes will depend on the specifications provided by your chosen design.
Mixing and Pouring Concrete
Once the holes are dug, it’s time to mix and pour the concrete for the footings. Follow the instructions provided by the concrete manufacturer to ensure proper mixing. Use a wheelbarrow or large bucket to transport the mixed concrete to the holes, and fill them until they are level with the ground. Allow the concrete to cure and harden according to the manufacturer’s instructions before proceeding.
Installing Post Anchors
If you decide to use post anchors instead of concrete footings, follow the instructions provided by the manufacturer to install them properly. Typically, post anchors are attached to the bottom of the wooden posts and then secured to the ground using screws or bolts. Make sure they are level and aligned correctly before moving forward with constructing the frame.

Constructing the Frame
Cutting and Preparing the Wood
Once the foundation is complete, it’s time to start constructing the frame of your garden arbor or pergola. Begin by cutting the wood to the required lengths and dimensions, based on your chosen design. Take accurate measurements and use a circular saw or miter saw to ensure precise cuts. Sand the edges if needed to create smooth and professional-looking components.
Building the Posts
Constructing the posts is a critical step in building the frame of your garden arbor or pergola. Measure, cut, and attach the necessary pieces of wood to create sturdy and upright posts. Use brackets or screws to secure the connections and ensure stability. It’s essential to double-check that the posts are level and plumb before proceeding.
Attaching Crossbeams and Lattice
Next, attach the crossbeams to the top of the posts to create the framework for the roof. Measure and cut the crossbeams to fit snugly and securely on the posts. Use brackets, screws, or other appropriate fasteners to attach them firmly in place. If your design includes lattice work, measure, cut, and attach the lattice sections between the posts. This will add decorative elements as well as support for climbing plants.
Adding Decorative Trim
To enhance the aesthetic appeal of your garden arbor or pergola, consider adding decorative trim. This can include finials or other decorative elements that add a touch of elegance to the structure. Measure and cut the trim pieces to fit around the posts and crossbeams, and attach them securely with appropriate fasteners. Take your time during this step to ensure precision and attention to detail.
Installing the Roof
Choosing the Roof Material
The choice of roof material for your garden arbor or pergola will depend on factors such as personal preference, budget, and climate. Options range from traditional materials like shingles or tiles to more modern choices like corrugated metal or polycarbonate panels. Consider the durability, maintenance requirements, and visual impact of each material before making a decision.
Cutting and Attaching Rafters
Once you have selected the roof material, it’s time to cut and attach the rafters. These structural elements will support the roofing material and provide the framework for the roof. Measure and cut the rafters to the appropriate length and angle, ensuring they fit securely onto the crossbeams. Use brackets, screws, or other suitable fasteners to attach the rafters securely to the frame.
Installing Roofing Material
With the rafters in place, it’s time to install the roofing material you have chosen. Follow the manufacturer’s instructions carefully to ensure proper installation. Whether you are using shingles, panels, or other materials, take your time to align and secure them correctly. This step will provide the desired shade and protection from the elements.
Weatherproofing
To ensure the longevity and durability of your garden arbor or pergola, it’s crucial to weatherproof it. Apply a weatherproofing sealant or stain to the wood components, following the manufacturer’s instructions. This step will protect the wood from rot, decay, and weather damage, extending the lifespan of your structure.

Finishing Touches
Stain or Paint
To add the final touch of beauty and protection to your garden arbor or pergola, consider staining or painting it. Choose a stain or paint color that complements your garden’s aesthetics and your personal style. Apply the stain or paint evenly across the wood surface, and allow it to dry completely before proceeding.
Sealing the Wood
After staining or painting, it’s essential to apply a sealant to the wood to enhance its protection and durability. Choose a sealant specifically designed for outdoor use and follow the instructions for application. Applying a sealant will help repel water, prevent cracking, and ensure your garden arbor or pergola withstands the test of time.
Adding Accessories and Decorations
To personalize and enhance the functionality of your garden arbor or pergola, consider adding accessories and decorations. This could include hooks for hanging plants or lights, benches for seating, or curtains for privacy. Consider your specific needs and preferences and choose accessories that will make your outdoor space even more enjoyable and inviting.
Planting and Landscaping
Choosing Climbing Plants
To further beautify your garden arbor or pergola and enhance its natural aesthetic, consider choosing climbing plants. Different climbing plants offer various colors, scents, and foliage, providing a visually pleasing and dynamic backdrop for your structure. Some popular choices include jasmine, clematis, wisteria, and climbing roses.
Planting and Training Vines
Once you have selected the climbing plants, it’s time to plant and train them to grow on your garden arbor or pergola. Dig holes around the posts and plant the vines, providing initial support, such as trellises or wire mesh, for them to climb. As the plants grow, gently guide and secure their tendrils to the structure to encourage upward growth and coverage.
Considering Shade and Privacy
In addition to their aesthetic appeal, climbing plants can also provide shade and privacy to your garden arbor or pergola. Consider the desired level of shade and privacy when choosing the type of climbing plants. Some species offer dense foliage that can create a cool and secluded retreat, while others may allow more light and airflow.
Landscaping Around the Arbor or Pergola
To create a cohesive and harmonious outdoor space, don’t forget to landscape around your garden arbor or pergola. Plant flowers, shrubs, or ground cover around the base of the structure to soften the edges and blend it seamlessly into the surrounding garden. Consider using mulch or decorative rocks to create defined pathways or borders, enhancing the overall aesthetic appeal.

Maintenance and Care
Regular Cleaning
To keep your garden arbor or pergola looking its best, regular cleaning is essential. Remove debris, leaves, and any accumulated dirt or dust from the surface and between the wood components. Use a mild soap solution and a soft brush to gently scrub away any stains or discoloration. Rinse thoroughly with water and allow the structure to dry completely.
Inspecting and Repairing Wood
Periodically inspect the wood components of your garden arbor or pergola for signs of damage or deterioration. Look for cracks, splintering, or discoloration. If any issues are identified, take appropriate measures to repair or replace the affected areas. This may involve sanding, sealing, or patching the wood to ensure its structural integrity and visual appeal.
Replacing Rotted or Damaged Parts
Over time, wood may experience rot or other significant damage. If any parts of your garden arbor or pergola are severely decayed or compromised, it’s important to replace them promptly. Remove the damaged sections carefully and replace them with new, matching components. This will prevent further decay and ensure the longevity of your structure.
Seasonal Maintenance
To keep your garden arbor or pergola in optimal condition, consider performing seasonal maintenance tasks. This may include reapplying sealant or stain, inspecting and repairing any damage caused by weather or pests, and pruning or training climbing plants to promote healthy growth. Regular maintenance will prolong the lifespan of your structure and keep it looking beautiful year-round.
Conclusion
Enjoying Your DIY Garden Arbor or Pergola
Congratulations! You have successfully completed the construction of your garden arbor or pergola. Take a moment to appreciate your hard work and enjoy the beautiful outdoor space you have created. Whether you choose to relax in the shade or host memorable gatherings, your garden arbor or pergola will undoubtedly become a cherished feature of your garden.
Adapting the Design to Your Vision
Remember, this DIY guide to building a garden arbor or pergola is just a starting point. Feel free to adapt the design and add your own personal touches to make it truly unique. Whether it’s the choice of materials, the size and shape, or the selection of climbing plants, let your creativity flourish. By customizing the structure to your vision, you will create a space that reflects your individual style and brings joy for years to come.

