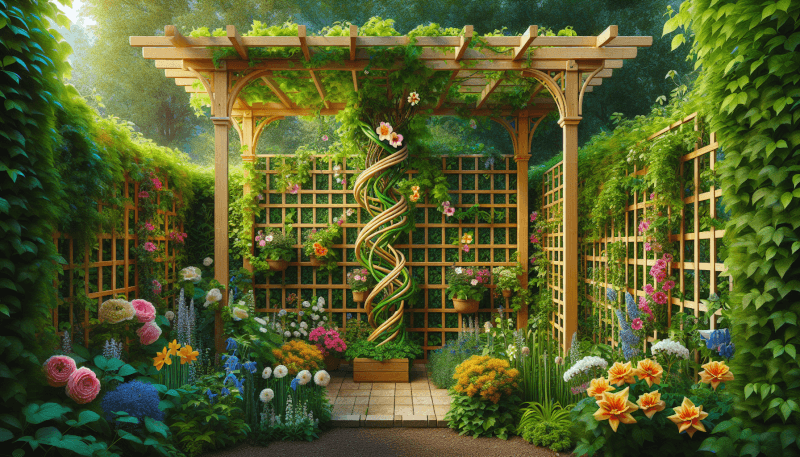
So, you’ve been dreaming of transforming your backyard into a lush oasis of vibrant blooms and foliage, but you’re not quite sure where to start. Look no further! This article is here to guide you through the process of building your very own garden trellis, an essential addition for any aspiring green-thumb. Whether you’re a seasoned DIY enthusiast or a novice with a passion for plants, this step-by-step guide will equip you with all the knowledge you need to create a beautiful and functional trellis that will not only support your climbing plants but also enhance the overall aesthetics of your garden. So, roll up your sleeves, grab your tools, and get ready to immerse yourself in the joy of building a garden trellis that will make your backyard the envy of all your neighbors.
Materials and Tools
Choosing the right materials
When it comes to building a garden trellis, choosing the right materials is essential for a sturdy and durable structure. Start by considering the type of wood you want to use. Cedar and redwood are popular choices due to their natural resistance to rot and insects. Additionally, you’ll need screws, corner brackets, and possibly vine plant supports, depending on your design. Remember to opt for materials that are weather-resistant and can withstand outdoor conditions.
Essential tools
To successfully build your garden trellis, you’ll need a few essential tools. These include a measuring tape, a level to ensure a straight frame, a circular saw or hand saw for cutting the wooden boards, a power drill with drill bits for pilot holes, a shovel for digging post holes, a screwdriver or drill driver for attaching screws, and a pair of safety goggles to protect your eyes during the construction process.
Optional tools
While the essential tools mentioned above are enough to get the job done, there are a few optional tools that can make the process easier and more efficient. Consider using a miter saw for precise angle cuts, a post hole digger or auger for digging the post holes, and clamps or a vice to hold the wooden boards securely while you work. These optional tools can save you time and effort, but they are not necessary if you don’t already have them.
Design Considerations
Determining the purpose
Before starting the construction of your garden trellis, it’s important to determine its purpose. Are you planning to use it as a decorative element, a privacy screen, or as a support for climbing plants? Knowing the purpose will help you select an appropriate design and size for your trellis. For example, if you want to grow heavy and large plants, you’ll need to build a stronger and more substantial trellis compared to a trellis used solely for decorative purposes.
Selecting a design style
Another consideration when building a garden trellis is selecting a design style that complements your garden aesthetics. Whether you prefer a classic, modern, or rustic look, there are various design options available. Some popular styles include lattice, arched, and fan trellises. Take into account the overall theme and elements of your garden to choose a design that enhances its visual appeal.
Sizing the trellis
The size of your garden trellis will depend on the available space and the intended purpose. Measure the area where you plan to install the trellis and consider the height and width you desire. Remember that a taller trellis will provide more vertical growing space, while a wider trellis will accommodate more plants. Make sure to leave enough room for the plants to thrive and spread their foliage without overcrowding.

Preparing the Area
Choosing a suitable location
Selecting a suitable location for your garden trellis is crucial as it will determine the success of your plants and the overall functionality of the structure. Consider factors such as sun exposure, wind patterns, and proximity to water sources. Most climbing plants require ample sunlight, so choose a spot that receives at least six hours of direct sunlight per day. Additionally, ensure that the location is easily accessible for maintenance and watering purposes.
Clearing and leveling the ground
Once you have chosen the location, it’s time to clear and level the ground where the trellis will be installed. Remove any rocks, debris, or existing vegetation from the area. This will prevent interference with the trellis installation and create a clean slate for your climbing plants. Use a shovel and a rake to even out the surface, ensuring a smooth and stable foundation for your trellis.
Building the Frame
Cutting the wooden boards
To build the frame of your garden trellis, start by cutting the wooden boards to the desired length and width. Use a measuring tape to mark the dimensions and a circular saw or hand saw to make the cuts. Remember to wear safety goggles and take accurate measurements to ensure the pieces fit together properly. If you’re using a miter saw, it can come in handy for cutting angled or decorative pieces.
Assembling the frame
Once the boards are cut, it’s time to assemble the frame of your trellis. Lay the pieces on a flat surface and use a level to ensure they are aligned correctly. Use a power drill to create pilot holes at the joints, then attach the boards together using screws. This will ensure a sturdy and secure frame that can withstand the weight of the climbing plants.
Attaching corner brackets
For added stability, consider attaching corner brackets at the joints of the frame. These metal brackets will reinforce the corners and prevent the frame from wobbling or collapsing under the weight of the plants. Position the brackets so that they align with the edges of the wooden boards and secure them with screws. This simple addition will make your trellis even more durable and long-lasting.

Installing Support Posts
Determining the number of posts
The number of support posts needed for your garden trellis will depend on its size and design. As a general guideline, plan to have a post on each corner of the frame and one in the center of longer sides. If your trellis is particularly wide or tall, additional posts may be necessary for extra support. Consider the weight of the plants and the structure itself when determining the spacing and number of posts required.
Digging the post holes
Using a shovel or a post hole digger, start digging the holes for the support posts. The depth of the holes should be approximately one-third of the length of the posts. This will provide enough stability and prevent the trellis from toppling over. Make sure the holes are evenly spaced and aligned with the corners and center of the frame. Remove any excess dirt from the holes to ensure a snug fit for the posts.
Setting the posts
Once the holes are dug, it’s time to set the support posts. Place the posts in the holes, making sure they are plumb and level. Fill the holes with soil or gravel to secure the posts in place, firmly packing it around the base. Use a level to double-check the vertical alignment of the posts. If necessary, make adjustments by adding or removing soil until the posts are perfectly straight. Give the posts time to settle before moving on to the next steps.
Attaching the Trellis to the Posts
Positioning the trellis against the posts
With the support posts in place, it’s time to position the trellis against them. Carefully lift the trellis and align it with the posts, ensuring that it fits snugly within the frame. Make any necessary adjustments to the position of the trellis to ensure it is centered and level. Take your time to achieve a perfect fit, as this will impact the overall stability and appearance of the trellis.
Securing the trellis with screws
Once you have positioned the trellis, it’s time to secure it to the support posts. Use a power drill or screwdriver to attach the trellis to the posts using screws. Position the screws at regular intervals along the edges of the trellis, ensuring they penetrate both the trellis and the posts. This will prevent the trellis from shifting or becoming loose over time, ensuring it stays firmly in place as your plants grow and climb.

Adding Cross Braces
Measuring and cutting the cross brace pieces
To provide additional support and stability to your garden trellis, consider adding cross braces. These are diagonal pieces of wood that connect the corners of the frame. Start by measuring and cutting the cross brace pieces to the appropriate length. Use a measuring tape to determine the correct length and a circular saw or hand saw to make the cuts. Double-check the angles to ensure the pieces fit properly.
Attaching the cross braces to the frame
With the cross brace pieces cut, it’s time to attach them to the frame of the trellis. Position the braces diagonally across the corners of the frame, creating an X shape. Use a power drill or screwdriver to secure the braces to the frame with screws. Make sure the braces are tightly fastened, as they will provide essential support and prevent the frame from wobbling or collapsing under the weight of the plants.
Choosing Climbing Plants
Considering the climate and sunlight
When selecting climbing plants for your garden trellis, it’s important to consider the climate and sunlight conditions in your area. Different plants thrive in varying climates, so choose plants that are well-suited to your region’s temperature and weather patterns. Additionally, consider the amount of sunlight your trellis receives. Some plants require full sun, while others can tolerate partial shade. Choose plants that will thrive in the specific conditions of your garden.
Selecting suitable vine plants
When it comes to choosing vine plants for your trellis, there are numerous options available. Consider the overall look you want to achieve. Do you prefer vibrant flowers, lush foliage, or a combination of both? Some popular vine plants for trellises include clematis, morning glory, honeysuckle, jasmine, and climbing roses. Research the growth habits, care requirements, and blooming seasons of different vine plants to find the ones that best suit your preferences and garden conditions.

Planting and Training the Vines
Digging planting holes near the trellis
Before planting the vine plants, dig planting holes near the trellis. The holes should be deep and wide enough to accommodate the root ball of each plant. If your trellis has a wide frame, space the planting holes accordingly, ensuring that each plant has enough room to spread its roots. Take care not to damage any existing roots or underground utilities while digging the holes. Once the holes are dug, remove any rocks or debris from them.
Installing plant supports
To help the vines climb and attach to the trellis, consider installing plant supports. These can be in the form of hooks, strings, or wire attached to the trellis structure. Plant supports guide the vines in the desired direction and prevent them from tangling or falling off the trellis. Install the supports as the plants grow, adjusting them to accommodate the increasing height and spread of the vines. This will ensure that your trellis remains neat and organized throughout the growing season.
Training the vines to climb the trellis
As the vines start to grow, it’s important to train them to climb the trellis. Gently guide the vines towards the trellis structure and encourage them to wrap around the support system you have installed. Some vines may require additional assistance, such as tying them loosely with garden twine to encourage upward growth. Regularly check and adjust the vines as needed, so they continue to climb and cover the trellis evenly. With patience and care, your trellis will soon become a beautiful living wall of vibrant foliage and blooms.
Maintaining and Repairing
Regular pruning and trimming
To keep your garden trellis in top shape and ensure the health of your climbing plants, regular pruning and trimming are essential. Remove any dead or damaged branches, as well as any excessive growth that may be overpowering the trellis. Prune your plants according to their specific needs, whether they bloom on new or old wood, in order to promote healthy growth and flowering. Regular maintenance will help keep your trellis looking tidy and prevent any overgrowth that may put strain on the structure.
Checking for pests and diseases
Regularly inspecting your plants and trellis for pests and diseases is an important part of maintaining their health. Look out for insect infestations, such as aphids or spider mites, and take appropriate measures to control them. Additionally, keep an eye out for any signs of diseases, such as leaf spots or powdery mildew. Promptly address any issues you identify by using organic or chemical treatments, depending on your personal preferences and the severity of the problem.
Repairing damaged sections
Over time, it’s possible that certain sections of your trellis may become damaged or weakened. This can be due to weather conditions, plant growth, or accidents. Inspect your trellis regularly and identify any areas that require repair. If a wooden board is cracked or broken, replace it with a new piece of wood and secure it to the frame. If screws have become loose, tighten them or replace them with longer and sturdier screws. By addressing any damages promptly, you can extend the lifespan of your trellis and ensure its continued functionality.
Building a garden trellis is a rewarding DIY project that adds beauty and functionality to your outdoor space. By following these step-by-step instructions and considering the design considerations, you’ll be able to create a trellis that suits your needs and enhances the aesthetics of your garden. With proper maintenance and care, your trellis will provide a stunning backdrop for climbing plants and become a centerpiece of your outdoor oasis.

