Imagine transforming your garden into a lush oasis with flourishing plants and vibrant flowers. With our DIY guide to installing a drip irrigation system, you can take the guesswork out of watering and achieve the perfect balance of moisture for your plants. No more dragging around hoses or forgetting to water – this easy-to-follow guide will help you save time, conserve water, and keep your garden looking its best all season long. Say goodbye to wilting plants and hello to a garden that thrives with our step-by-step instructions on installing a drip irrigation system.

Choose a Suitable Location
Evaluate Your Yard
Before installing a drip irrigation system, take some time to evaluate your yard. Look for areas that are in need of watering and consider the size and shape of your yard. It’s important to choose a suitable location where the system can effectively reach all areas that require watering.
Consider the Water Source
Another important factor to consider is the water source. Determine if you have access to a sufficient water supply that can provide enough water for your plants. It’s also important to assess the water quality and ensure that it is suitable for drip irrigation.
Check the Terrain
The terrain of your yard can also impact the installation of a drip irrigation system. Take note of any slopes or uneven surfaces that may require special attention during the installation process. It’s important to ensure that the system will be able to distribute water evenly across all areas of your yard.
Assess Sun Exposure
Lastly, consider the sun exposure in your yard. Different plants have different sunlight requirements, so it’s essential to choose a location that can provide the appropriate amount of sun for your plants. Be mindful of any shading caused by buildings, trees, or other structures that may affect the efficiency of the system.
Gather the Necessary Tools and Materials
Drip Irrigation Kit
To get started, you’ll need a drip irrigation kit. This kit will typically include all the necessary components such as tubing, emitters, connectors, and a timer.
PVC Pipe Cutter
A PVC pipe cutter will come in handy when cutting and measuring the PVC pipes for your mainline and submain.
Teflon Tape
Teflon tape is used to create a watertight seal when assembling the PVC pipes.
PVC Primer and Cement
These items are necessary for connecting the PVC pipes. The primer helps clean the surfaces, while the cement is used to bond the pipes together.
Shovel
A shovel will be needed to dig trenches or holes for the installation of the system.
Trowel
A trowel can be useful for leveling the ground or removing any obstacles during the installation process.
Measuring Tape
Accurate measurements are crucial for the proper installation of a drip irrigation system. A measuring tape will help ensure that the system is installed correctly.
Timer
A timer is an essential component of a drip irrigation system. It allows you to set specific watering schedules and ensures that your plants receive the appropriate amount of water.
Emitters and Connectors
Emitters and connectors are responsible for delivering water to your plants. Make sure you have the necessary types and quantities for your specific installation.
Filters
Filters help prevent clogs and keep the water flowing smoothly throughout the system. Consider installing a filter to ensure the longevity and effectiveness of your drip irrigation system.
Pressure Regulator
A pressure regulator helps control the water pressure in your system. This is important to prevent damage to the pipes and emitters, and to ensure consistent water distribution.
Poly Tubing
Poly tubing is used to carry water from the mainline to the individual plants. Make sure you have enough tubing to reach all areas of your yard.
Stakes
Stakes are used to secure the tubing and emitters in place. They help prevent movement and ensure that the system functions properly.
Design Your Drip System
Create a Layout Plan
Before starting the installation process, take some time to create a layout plan for your drip irrigation system. This plan should include all the necessary measurements, placement of plants, and the layout of the tubing and emitters.
Determine Watering Zones
Divide your yard into watering zones based on plant types, water requirements, and sun exposure. This will help ensure that each zone receives the appropriate amount of water.
Calculate Watering Needs
Calculate the watering needs of your plants to determine the appropriate schedule and duration for each zone. Consider factors such as plant type, soil type, and weather conditions to determine the optimal watering schedule.
Plan Emitters Placement
Based on the watering needs of your plants, plan the placement of emitters. Consider the distance between plants and the flow rate of the emitters to ensure even water distribution.
Consider Plant Spacing
Proper plant spacing is crucial to ensure that each plant receives enough water. Take into account the growth habits and size of your plants when determining the spacing between them.
Ensure Proper Water Pressure
Water pressure is an important factor in the performance of a drip irrigation system. Make sure the water pressure is suitable for the emitters and adjust as needed to ensure proper water distribution.
Prepare the Area
Mark the Path of the Drip Line
Using marking flags or stakes, mark the path of the drip line according to your layout plan. This will serve as a guide during the installation process.
Dig Trenches or Holes
Using a shovel, dig trenches or holes along the marked path of the drip line. The depth and width of the trenches will depend on the size of the tubing and the depth at which you want to bury it.
Remove Obstacles
Clear the area of any obstacles such as rocks, roots, or existing irrigation systems. This will ensure a smooth installation process and prevent any interference with the functionality of the drip irrigation system.
Level the Ground
Before installing the system, ensure that the ground is level. This will help ensure proper water distribution and prevent any pooling or runoff.
Consider Weed Control
Consider implementing a weed control strategy before installing the drip irrigation system. This will help prevent weeds from interfering with the performance of the system and reduce the need for manual weed removal.

Install the Mainline and Submain
Cut the PVC Pipe
Using a PVC pipe cutter, measure and cut the PVC pipes according to your layout plan. Be sure to make clean cuts to ensure a proper fit.
Clean and Prime Pipes
Before connecting the PVC pipes, clean the ends with a cloth or brush to remove any dirt or debris. Then, apply PVC primer to the ends of the pipes to ensure a strong bond.
Apply PVC Cement
Apply PVC cement to both the primed ends of the pipes and inside of the connectors. Then, quickly and firmly connect the pipes and connectors together, making sure they are fully seated.
Assemble the Pipes
Assemble the PVC pipes and connectors according to your layout plan. Ensure that the pipes are securely connected and aligned correctly.
Secure with Clamps
Once the pipes are assembled, use clamps to secure them in place. This will prevent any movement or disconnection during the installation process.
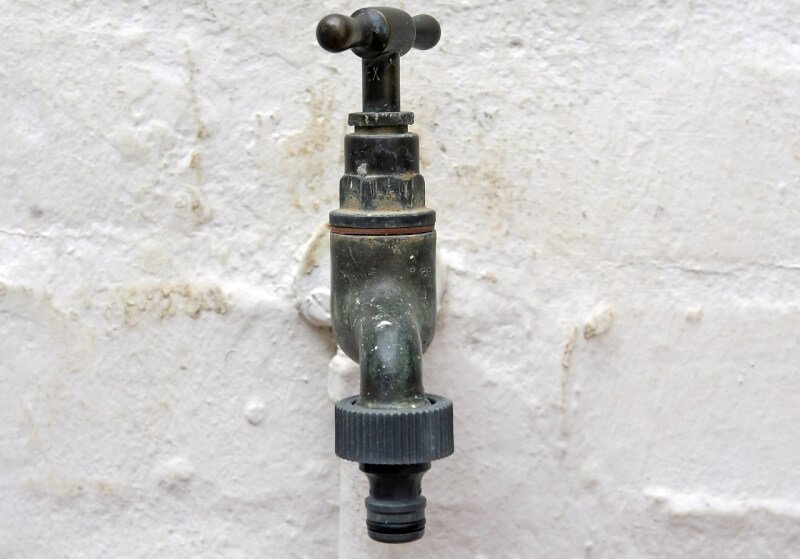
Connect the Mainline to the Water Source
Connect the mainline of the drip irrigation system to the water source using appropriate connectors and fittings. Ensure that the connection is tight and leak-free.
Install the Distribution Tubing
Measure and Cut Tubing
Measure and cut the distribution tubing according to your layout plan. Take accurate measurements to ensure that the tubing reaches all areas of your yard.
Attach Emitters and Connectors
Attach emitters and connectors to the distribution tubing. Follow the manufacturer’s instructions for proper installation and flow adjustment.
Secure Tubing with Stakes
Once the emitters and connectors are attached, use stakes to secure the distribution tubing in place. This will prevent movement and ensure proper water distribution.
Bury or Cover Tubing
Depending on your preference and the aesthetic of your yard, you can choose to bury the tubing in the trenches or cover it with mulch or landscaping fabric. This will help protect the tubing and keep it hidden.
Connect Tubing to Submain
Connect the distribution tubing to the submain using appropriate connectors and fittings. Ensure that the connection is tight and leak-free.

Install Emitters and Accessories
Select Appropriate Emitters
Based on your plant’s watering needs, select the appropriate emitters. Different plants may require different types of emitters, such as drippers, sprayers, or micro-sprinklers. Install the emitters according to the specifications provided by the manufacturer.
Place Emitters near Plants
Place the emitters near the base of the plants, ensuring that they are delivering water directly to the root zone. Adjust the flow rate or the number of emitters as needed to meet the watering needs of each plant.
Attach Drip Stakes or Bubblers
For plants that require a more directed flow of water, such as potted plants or trees, attach drip stakes or bubblers to the distribution tubing. These accessories help deliver water directly to the plant’s root zone.
Add Drip Line T and Elbow Connectors
For areas where the distribution tubing needs to change direction, use drip line T and elbow connectors. These connectors allow for easy maneuverability and ensure that the tubing is properly aligned.
Install Filters and Pressure Regulators
Install filters and pressure regulators as needed to ensure the longevity and effectiveness of your drip irrigation system. These accessories help prevent clogs and maintain optimal water pressure throughout the system.
Install a Timer and Backflow Preventer
Choose a Timer and Backflow Preventer
Select a timer that suits your watering needs and preferences. Consider features such as multiple watering programs, duration settings, and battery backup. Additionally, choose a backflow preventer that meets local plumbing codes and regulations.
Install the Timer
Install the timer near the water source and follow the manufacturer’s instructions for proper installation. Connect the timer to the mainline of the drip irrigation system and ensure that all connections are tight and leak-free.
Connect the Backflow Preventer
Connect the backflow preventer to the mainline of the drip irrigation system, following local plumbing codes and regulations. This will prevent contaminated water from flowing back into the water source.

Test the System
Check for Leaks
Before turning on the water, carefully inspect all connections and joints for any signs of leaks or drips. Tighten any loose connections and replace any faulty parts if necessary.
Inspect Water Pressure
Once the system is turned on, monitor the water pressure to ensure that it is within the recommended range for your emitters and plants. Adjust the pressure regulator as needed to achieve the optimal water pressure.
Monitor the Watering Coverage
Observe the watering coverage of the drip irrigation system. Ensure that all plants are receiving sufficient water and adjust the emitters or tubing placement as needed to improve coverage.
Adjust Emitters as Needed
After monitoring the system for a period of time, make adjustments to the emitters as needed. Increase or decrease the flow rate, move emitters closer or farther from plants, or add additional emitters if necessary to meet the watering needs of your plants.
Maintain and Troubleshoot
Perform Regular Maintenance
Regular maintenance is essential to keep your drip irrigation system functioning optimally. Clean the filters, inspect the tubing for any damage or leaks, and replace any worn-out or damaged components.
Clean Filters
Clean the filters regularly to prevent clogs and ensure proper water flow. Remove any debris or sediment trapped in the filters and rinse them thoroughly.
Flush System
Periodically flush the system to remove any accumulated dirt or debris. This will help prevent clogs and keep the emitters and connectors clean and free-flowing.
Replace Emitters When Necessary
Inspect the emitters regularly and replace any that are clogged, damaged, or no longer functioning properly. This will ensure that your plants continue to receive the correct amount of water.
Troubleshoot Common Issues
If you encounter any issues with your drip irrigation system, such as low water pressure, leaks, or uneven watering, refer to the troubleshooting guide provided by the manufacturer. Follow the recommended steps to identify and resolve the problem.
Installing a drip irrigation system can greatly simplify and automate the watering process in your yard. By following these steps and taking the time to plan and design your system properly, you can ensure that your plants receive the right amount of water efficiently and effectively. Remember to regularly maintain and troubleshoot your system to keep it in optimal condition. Enjoy the benefits of a healthy and thriving garden with the convenience of a drip irrigation system!

