Have you ever dreamt of having an abundant herb garden right in your backyard, brimming with fresh flavors and enticing aromas? Look no further, as this DIY guide will show you how to create a stunning garden herb spiral that not only adds beauty to your outdoor space, but also maximizes space and enhances the growth of your favorite herbs. With just a few simple steps, you’ll be on your way to enjoying the bountiful harvest of your very own herb spiral in no time. So roll up your sleeves, grab your gardening tools, and let’s get started on this exciting journey to creating a thriving herb haven!
Materials Needed
To create a garden herb spiral, you will need a few essential materials. These include:
Bricks or stones
First and foremost, you will need bricks or stones to construct the spiral structure. These will serve as the building blocks for your herb garden.
Sand or gravel
Sand or gravel is necessary to create a sturdy foundation for the spiral structure. It helps with stability and drainage.
Topsoil
Topsoil is the nutrient-rich layer of soil that is perfect for planting and growing herbs. It provides the necessary support for the herb plants to thrive.
Compost
Compost is a valuable addition to the topsoil. It adds organic matter and nutrients, enriching the soil and promoting healthy plant growth.
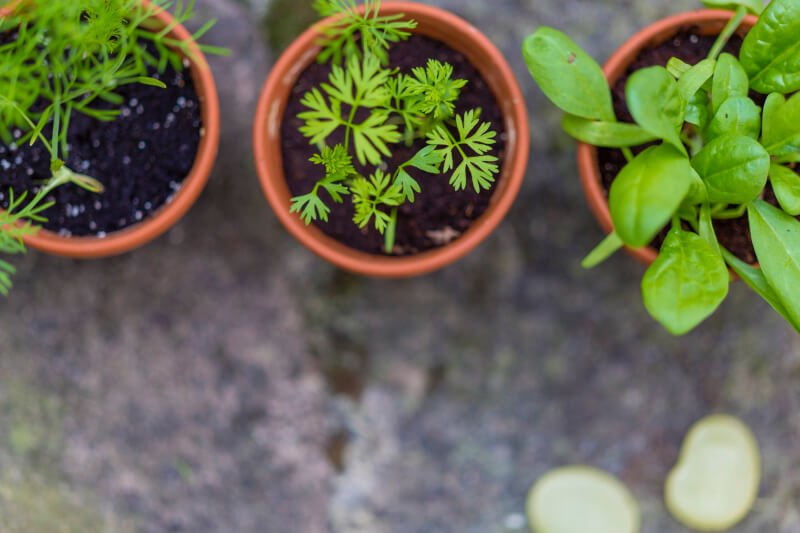
A variety of herb plants
To create a diverse and vibrant herb spiral, you will need to gather a collection of herb plants. Choose herbs that appeal to your taste preferences and consider their compatibility with each other.
Hand tools
Lastly, you will need a few hand tools to help with the construction and maintenance of your herb spiral. Some essential tools include a shovel, rake, trowel, and other tools that will make the process easier and more efficient.
Choosing the Right Location
Before you start building your herb spiral, it is essential to carefully select the right location for it. Consider the following factors when choosing the spot:
Consider sunlight exposure
Most herbs thrive in full sun, so it is crucial to select a location that receives ample sunlight throughout the day. Take note of any shady spots or areas that are shaded by tall trees or structures.
Think about drainage
Good drainage is vital for the health of your herb plants. Avoid areas with poor drainage, such as low-lying spots that tend to retain water. It’s best to choose a slightly elevated area or create a drainage system if necessary.
Accessibility and convenience
Consider the accessibility and convenience of the location. You want your herb spiral to be easily accessible for watering, harvesting, and general maintenance. Select a spot that is convenient for you to reach and enjoy the herbs regularly.

Preparing the Site
Once you have chosen the perfect location for your herb spiral, it’s time to prepare the site. Follow these steps to get your site ready for construction:
Clear the area
Before you start building, clear the area of any vegetation or debris. Remove any grass or weeds, and clear away any rocks or obstacles that may hinder the construction process.
Level the ground
After clearing the area, you will need to level the ground where the herb spiral will be constructed. Use a shovel or rake to even out the surface and ensure a stable foundation.
Mark the spiral shape
Using a hose or a string, mark the shape of the spiral on the leveled ground. This will serve as a guide when laying the bricks or stones. Start from the center and spiral outward, creating a visually pleasing and functional shape.
Building the Spiral
With the site prepared, it’s time to start building the herb spiral. Follow these steps to construct the spiral structure:
Lay the first layer of bricks
Begin by laying the first layer of bricks or stones along the marked spiral shape. Ensure that they are firmly in place and evenly spaced.
Create a circular foundation
Continue stacking the bricks or stones, gradually increasing the height of the spiral. As you build, make sure to create a circular foundation that maintains the spiral shape.
Stack the subsequent layers
Continue stacking and layering the bricks or stones until you reach the desired height for your herb spiral. Take your time to ensure each layer is sturdy and well-aligned.
Fill the interior with sand or gravel
To enhance drainage and stability, fill the interior of the spiral structure with sand or gravel. This will allow excess water to drain effectively, preventing waterlogging and root rot.

Adding Soil and Compost
With the spiral structure complete, it’s time to add soil and compost to create a nourishing environment for your herb plants. Here’s what you need to do:
Fill the spiral with topsoil
Fill the spiral structure with topsoil, making sure to distribute it evenly. Leave some space at the top for adding compost later on. Ensure that the topsoil reaches all areas of the spiral, providing ample room for herb plant roots to grow.
Mix in compost for added nutrients
After filling the spiral with topsoil, mix in compost to enrich the soil with additional nutrients. Compost acts as a natural fertilizer, promoting healthy and robust herb growth. Mix the compost evenly throughout the topsoil for maximum effectiveness.
Choosing Herb Plants
Choosing the right herb plants for your spiral is crucial to its success and your enjoyment of the garden. Consider the following factors when selecting herb plants:
Consider climate and growing conditions
Each herb has specific climate and growing conditions preferences. Research which herbs thrive in your climate and choose those that will thrive in your specific location.
Select a variety of herbs
To create a diverse and exciting herb garden, select a variety of herbs with different flavors, textures, and scents. This will enhance your culinary experiences and provide a visually appealing garden.
Check for compatibility
Some herbs have specific compatibility requirements. Research the compatibility of the herb plants you have chosen to ensure they will thrive together without hindering each other’s growth.

Planting the Herbs
With your herb spiral structure complete and the plants selected, it’s time to plant the herbs. Follow these steps to start growing your garden:
Arrange the plants according to their needs
Consider the specific needs of each herb plant and arrange them accordingly within the spiral. Place herbs with similar sun and water requirements together to ensure optimal growing conditions.
Plant herbs in suitable locations
Take note of each herb’s growth habits and choose suitable locations within the spiral. Pay attention to how tall or sprawling a plant grows and ensure that it has adequate space and support to thrive.
Add mulch to retain moisture
To retain moisture and prevent weed growth, add a layer of mulch around the herb plants. This will help conserve water and keep the soil moist, reducing the need for frequent watering.
Caring for Your Herb Spiral
Maintaining your herb spiral is essential for the long-term health and productivity of your herbs. Here are some key points to keep in mind:
Watering and drainage
Water your herb spiral regularly, ensuring that the soil is moist but not overly saturated. Pay attention to drainage and adjust watering accordingly to avoid waterlogging.
Pruning and harvesting
Regularly prune your herb plants to encourage healthy growth and prevent overcrowding. Harvest herbs regularly to promote continuous growth and enjoy fresh flavors in your cooking.
Managing pests and diseases
Monitor your herb spiral for signs of pests and diseases. Take preventive measures, such as proper spacing and providing adequate airflow, to minimize the risk of infestations. If pests or diseases do appear, address them promptly using organic or natural methods.

Common Herb Spiral Designs
While the traditional circular spiral is the most common design for herb spirals, there are variations that you can explore:
Traditional circular spiral
The traditional circular spiral design is visually appealing and functional. It allows for easy access to all herbs and maximizes the use of space within the spiral.
Helix or spiral on a slope
A helix or spiral on a slope design is ideal for gardens with sloping terrain. This design adds an interesting visual element and utilizes the slope to create different planting zones for herbs with varied water and sunlight requirements.
Vertical spiral
A vertical spiral design is perfect for small spaces or vertical gardening. It can be attached to a wall or other vertical structure, allowing for a beautiful display of herbs while maximizing space.
Benefits of an Herb Spiral
Creating an herb spiral in your garden offers several benefits that make it a popular choice among gardening enthusiasts. Consider these advantages:
Maximizes use of limited space
If you have limited garden space, the herb spiral is an excellent solution. It allows you to grow a wide variety of herbs in a compact area, making the most of every square inch.
Enhances drainage and reduces erosion
The design of the herb spiral promotes excellent drainage, preventing water buildup and reducing the risk of erosion. The layers of the spiral structure help control the flow of water, creating a self-watering effect within the garden.
Creates microclimates for different herbs
The spiral shape of the herb garden creates microclimates, with different herbs benefiting from varying sun exposure and wind conditions. This allows you to grow a diverse range of herbs that may have different environmental preferences.
In conclusion, building a garden herb spiral is a rewarding DIY project that allows you to enjoy a bountiful herb garden in limited space. By carefully selecting the location, preparing the site, constructing the spiral, adding soil and compost, choosing the right herb plants, planting them in suitable locations, and providing proper care, you can create a thriving and visually appealing herb garden. With the added benefits of a herb spiral, such as maximizing space, enhancing drainage, and creating microclimates, you will be well on your way to enjoying fresh herbs for all your culinary endeavors. So, grab your tools, gather your materials, and get ready to embark on an exciting journey to create your own garden herb spiral. Happy gardening!

