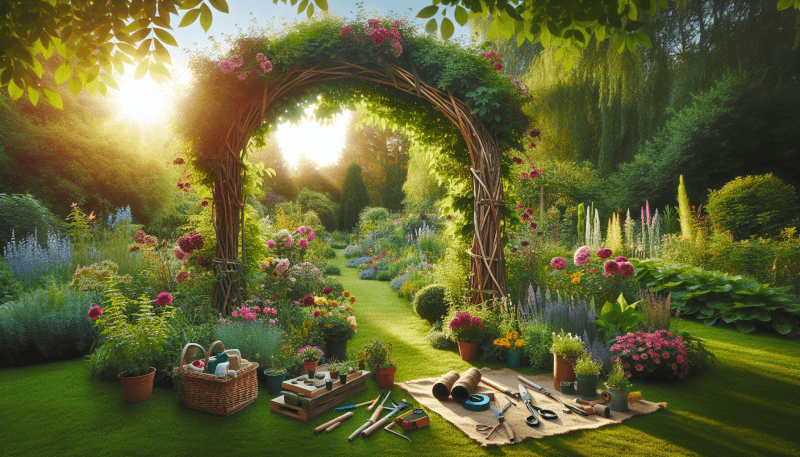
Imagine transforming your garden into a picturesque oasis with a charming DIY garden archway. This article will guide you through the step-by-step process of building your own garden archway, allowing you to add a touch of elegance while creating a stunning focal point. From gathering materials to assembling the archway, you’ll discover just how easy and enjoyable it can be to bring your garden dreams to life. Get ready to unleash your creativity and embark on a DIY project that will not only enhance your outdoor space but also provide an enchanting entrance that invites you to retreat into nature’s embrace.
Materials and Tools
To build a DIY garden archway, you will need the following materials and tools:
Wooden posts
Wooden posts are the main support for your archway, so choose strong and durable ones. Opt for posts that are thick and straight to ensure stability.
PVC pipes
PVC pipes will be used to create the arch structure of your garden archway. They are lightweight, easy to work with, and resistant to moisture and outdoor elements.
Galvanized screws
You will need galvanized screws to securely fasten the wooden posts and PVC pipes together. Make sure to use screws that are appropriate in length and thickness for your project.
Drill
A drill is an essential tool for creating pilot holes in the wooden posts and PVC pipes before screwing them together. It will ensure a stronger and more secure connection.
Saw
A saw will be needed to cut the PVC pipes to the desired length for your archway. Choose a saw that is suitable for cutting through plastic materials.
Measuring tape
Accurate measurements are crucial for constructing your garden archway. A measuring tape will help you determine the proper dimensions for the project.
Level
It’s important to ensure that your garden archway is level and straight. Using a level will help you achieve this by providing a visual indicator.
Marking pencil
A marking pencil will be used to mark the spots for digging holes, as well as for measuring and cutting the PVC pipes. Choose a pencil that is easily visible on different surfaces.
Paint or stain
To protect your wooden posts and enhance the overall appearance of your garden archway, consider applying paint or stain. Choose a color that complements your outdoor space.
Paintbrush
A paintbrush will be needed to apply paint or stain to the wooden posts. Make sure to choose a brush that is suitable for the size of your project and desired finish.
Planning and Preparation
Before you start building your DIY garden archway, it’s important to plan and prepare accordingly. Follow these steps:
Choose the location
Select a suitable location in your garden for the archway. Consider factors such as available space, sun exposure, and proximity to other garden features.
Determine the size and style
Decide on the size and style of your garden archway. Consider the dimensions that would work best for your garden landscape and the overall aesthetic you want to achieve.
Check local regulations
Some areas may have regulations or restrictions on building structures in residential gardens. Check with your local municipality or homeowner’s association to ensure compliance.
Gather necessary permits, if applicable
If your garden archway project requires permits or approvals, make sure to obtain them before starting the construction process. This will help you avoid any legal issues in the future.

Step 1: Digging Holes for the Posts
Once you have completed the planning and preparation stage, you can begin building your garden archway. Follow these steps:
Mark the spots for the holes
Using a marking pencil and measurements from your plan, mark the spots where the posts will be placed. Ensure that the markings are accurately aligned and evenly spaced.
Dig the holes
Use a shovel or an auger to dig holes at the marked spots. The size of the holes should be determined by the dimensions of your posts, ensuring they are deep and wide enough for stability.
Ensure proper depth and width
Check the depth and width of each hole to ensure they are consistent and appropriate for the size of your posts. Use a measuring tape or level to verify accurate measurements.
Step 2: Installing the Posts
After digging the holes, you can now proceed with installing the wooden posts. Follow these steps:
Place the first post in a hole
Insert one of the wooden posts into a hole, ensuring that it stands upright and is centered within the hole. Make sure that the post is securely positioned and stable.
Check for level and alignment
Using a level, check if the post is perfectly vertical and aligned with your desired archway shape. Make any necessary adjustments by adding or removing soil from the hole.
Secure the post with screws
Once the post is level and aligned, use galvanized screws to secure it in place. Drill pilot holes and then insert the screws through the post and into the surrounding soil.
Repeat the process for the second post
Following the same steps, place the second wooden post in the remaining hole. Check for level, alignment, and stability before securing it with galvanized screws.

Step 3: Measuring and Cutting the Archway
Now that the posts are securely installed, you can proceed with measuring and cutting the PVC pipes to create the archway structure. Follow these steps:
Measure the desired width and height of the archway
Using a measuring tape, determine the desired width and height for your archway. Measure between the two wooden posts to ensure accuracy.
Mark the measurements on the PVC pipes
Using a marking pencil, transfer the measurements onto the PVC pipes. Make sure to mark the points where the pipes will align with the wooden posts.
Cut the PVC pipes using a saw
Carefully cut the PVC pipes at the marked points using a saw. Ensure that the cuts are straight and clean to achieve a seamless and professional-looking archway.
Step 4: Assembling the Archway
With the PVC pipes cut to the proper length, it’s time to assemble the archway structure. Follow these steps:
Place the PVC pipes on top of the posts
Position the cut PVC pipes on top of the wooden posts, aligning them with the marked points. Ensure that the pipes fit snugly and evenly between the posts.
Check for proper alignment and fit
Using a level, check if the PVC pipes are aligned and level horizontally. Make any necessary adjustments to ensure a straight and symmetrical archway.
Attach the pipes to the posts with screws or brackets
Once the PVC pipes are properly aligned, secure them to the wooden posts using galvanized screws or brackets. Drill pilot holes and insert the screws to create a strong connection.

Step 5: Finishing Touches
After assembling the archway structure, it’s time to add some finishing touches to enhance its appearance and durability. Follow these steps:
Sand any rough edges of the archway
Use sandpaper to smooth out any rough edges or imperfections on the wooden posts and PVC pipes. This will create a clean and polished finish for your garden archway.
Apply paint or stain for protection and aesthetic
Consider applying a coat of paint or stain to the wooden posts and PVC pipes. This not only adds a layer of protection against the outdoor elements but also enhances the overall aesthetic of your archway. Choose a color that complements your garden landscape and personal style.
Step 6: Securing the Archway
To ensure the stability and longevity of your garden archway, it’s important to secure it properly. Follow these steps:
Ensure stability by reinforcing with additional screws
Inspect the connections between the PVC pipes and the wooden posts. If necessary, add additional galvanized screws to reinforce the structure and enhance its stability.
Consider using concrete mix or gravel for added support
For added support, consider pouring concrete mix or gravel into the holes around the wooden posts. This will provide extra stability and prevent the archway from shifting or tilting over time.

Step 7: Enhancing the Archway
Once your garden archway is securely in place, you can enhance its appearance and functionality. Follow these steps:
Add climbing plants or flowers for a natural look
Consider planting climbing plants or flowers at the base of the archway. As they grow, they will naturally intertwine with the structure, creating a beautiful and vibrant entrance to your garden.
Hang decorative elements like lights or wind chimes
To add a personal touch and create a welcoming ambiance, hang decorative elements from the archway. String lights or wind chimes can create a charming and inviting atmosphere in your garden.
Maintenance and Care
To ensure that your garden archway remains in good condition and continues to enhance your outdoor space, regular maintenance and care are necessary. Follow these steps:
Inspect regularly for any loose screws or damaged parts
Periodically inspect your garden archway for any signs of loose screws or damaged parts. Tighten any loose screws and replace any damaged components to maintain the archway’s structural integrity.
Replace or repaint as needed
Over time, the wooden posts and PVC pipes may show signs of wear and weathering. Replace any worn-out or damaged materials promptly. Additionally, consider repainting or restaining the archway periodically to protect it and maintain its appearance.
Prune plants for proper growth and appearance
If you have climbing plants or flowers growing on the archway, regularly prune and trim them to encourage healthy growth and maintain the desired appearance. Remove any dead or overgrown foliage to keep the plants looking neat and tidy.
By following these steps, you can build a beautiful and functional DIY garden archway that adds charm and elegance to your outdoor space. Enjoy the process of constructing your archway and creating a welcoming entrance to your garden. Happy building!

